Can I Cut a Taper on a Table Saw?
Yes, you can cut a taper on a table saw. Here’s how it’s done.
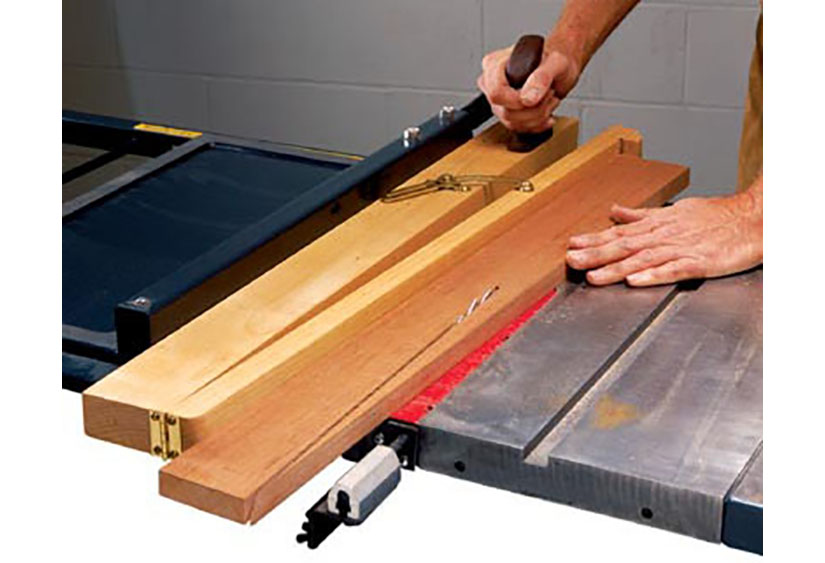
A taper is a gradual narrowing or sloping shape that can be cut into a piece of wood or other material. It is commonly used in woodworking projects to create angled edges or tapered legs for furniture. While a table saw is traditionally used for making straight cuts, it is possible to cut tapers with a table saw by using a tapering jig.
This jig holds the workpiece at an angle to the saw blade, allowing you to make precise and controlled taper cuts. With the right setup and precautions, you can achieve accurate and clean tapers on a table saw. We will discuss the steps involved in cutting a taper on a table saw using a tapering jig.
What Is A Taper Cut And Why Would You Want To Do It?
A taper cut is a technique used to gradually reduce the width of a piece of wood, resulting in a tapered shape. It can be done on a table saw by adjusting the fence and the blade’s angle. This method is commonly employed for various woodworking projects that require a tapered piece.
A taper cut is a woodworking technique that involves making a cut that gradually narrows or tapers along the length of the piece of wood. This can be done on a table saw, which is a versatile power tool commonly used for woodworking projects.
Taper cuts can be useful for a variety of reasons, allowing you to create unique shapes and profiles in your woodwork. Here are some common applications of taper cuts:
Definition Of A Taper Cut
- Tapered legs: Tapering the legs of a table or chair can add an elegant and modern touch to your furniture. By cutting a taper on the legs, you can create a sleek and tapered look, which can enhance the overall design aesthetic.
- Decorative elements: Taper cuts can also be used to create decorative elements in woodworking projects. For example, by tapering the edges of a shelf or the corners of a cabinet door, you can add visual interest and a unique design element to your piece.
- Joinery: Taper cuts can be used in joinery to create strong and secure connections between two pieces of wood. By tapering one end of a wooden dowel or peg, it can easily slide into a tapered hole, creating a tight and secure fit.
- Functional purposes: Taper cuts can also serve functional purposes, such as in the construction of stairs. By tapering one side of a stair tread, you can create a comfortable and safe surface for walking up and down the stairs.
- Custom projects: Taper cuts provide the flexibility to create custom designs and shapes in woodworking projects. Whether you’re building a guitar neck, a picture frame, or a decorative molding, taper cuts offer endless possibilities for customization.
Taper cuts on a table saw can be achieved by adjusting the angle of the saw blade or by using a tapering jig, which is a specialized accessory that helps guide the wood through the cut at a precise angle.
By mastering the technique of taper cuts, you can take your woodworking skills to the next level and create unique and visually appealing pieces.

Credit: m.youtube.com
Factors To Consider Before Attempting A Taper Cut On A Table Saw
Before attempting a taper cut on a table saw, it’s essential to consider factors like blade angle, cutting speed, and stock stability. With careful planning and proper technique, cutting a taper on a table saw is possible, but it requires attention to detail and safety precautions.
Always prioritize safety and follow manufacturer guidelines when attempting this technique.
Taper cuts on a table saw can add elegance and style to your woodworking projects. However, before embarking on this technique, there are a few important factors to consider. In this section, we will discuss safety precautions and guidelines, choosing the right table saw, and essential tools and accessories required for taper cuts.
Safety Precautions And Guidelines
To ensure a safe and accident-free taper cut on a table saw, consider the following precautions and guidelines:
- Always wear appropriate safety gear, including safety glasses and ear protection.
- Make sure the table saw is in good working condition, with all safety features functioning properly.
- Ensure the table saw is set up on a stable and level surface to avoid unnecessary vibrations.
- Familiarize yourself with the table saw’s user manual and understand the correct operating procedures.
- Keep your work area clean and free from clutter, ensuring proper lighting for better visibility.
- Use push sticks or a push block to maintain a safe distance between your hands and the saw blade.
- Never attempt a taper cut without a clear plan and understanding of the technique.
- Start with a smaller piece of wood for practice before working on larger projects.
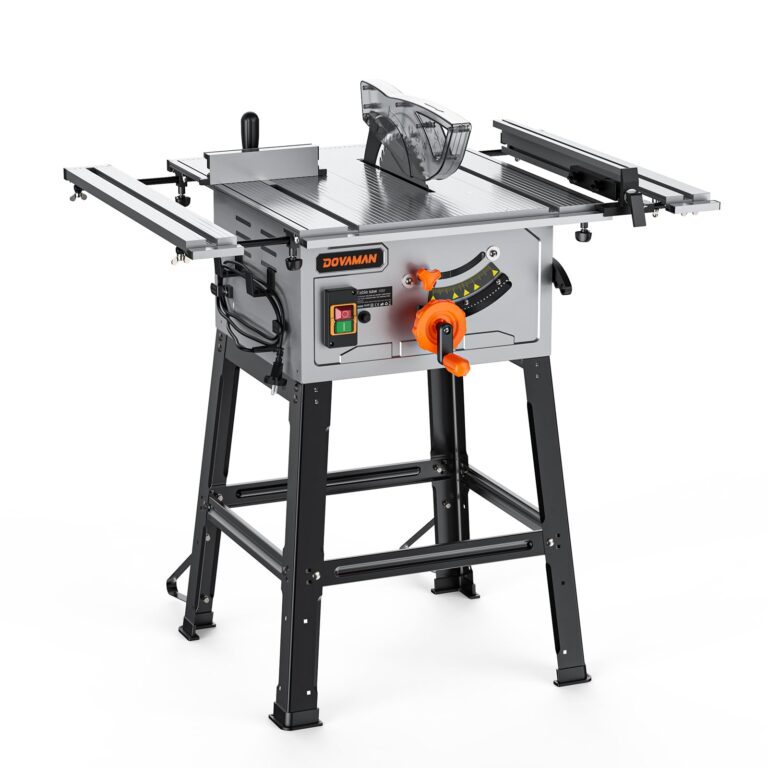
Choosing The Right Table Saw For Taper Cuts
When it comes to taper cuts, not all table saws are created equal. Consider the following factors when selecting a table saw:
- Look for a table saw with a miter gauge slot that allows for angle adjustments.
- Ensure the table saw has an adjustable blade height feature for precise taper cuts.
- Opt for a table saw with a large rip capacity to accommodate wider pieces of wood.
- Consider a table saw with a smooth and stable fence system to ensure accuracy during cuts.
- Evaluate the motor power of the table saw to handle different types of wood and cuts.
- Take into account the table saw’s overall stability and durability for long-term use.
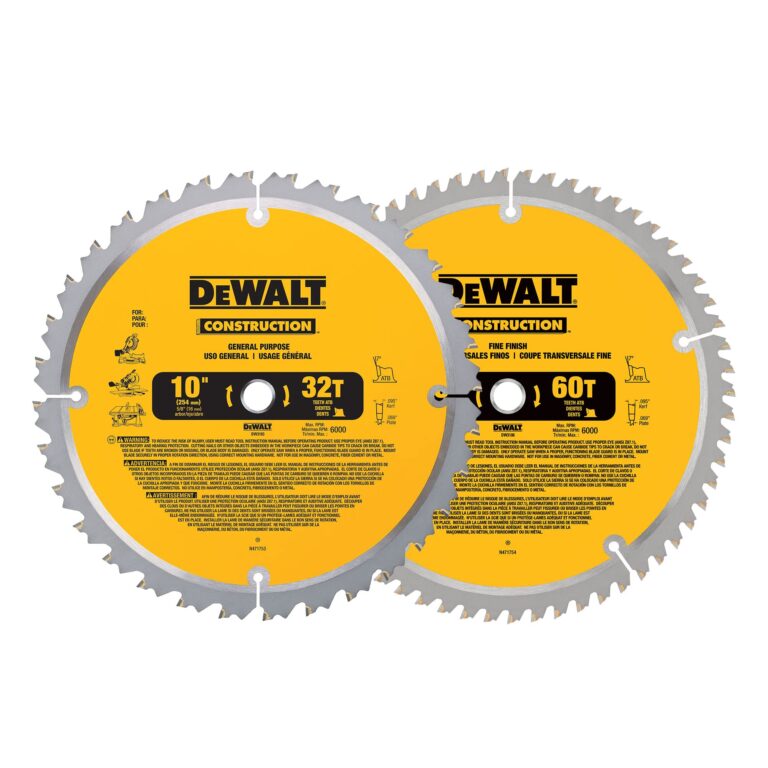
Essential Tools And Accessories
To successfully execute a taper cut on a table saw, the following tools and accessories are essential:
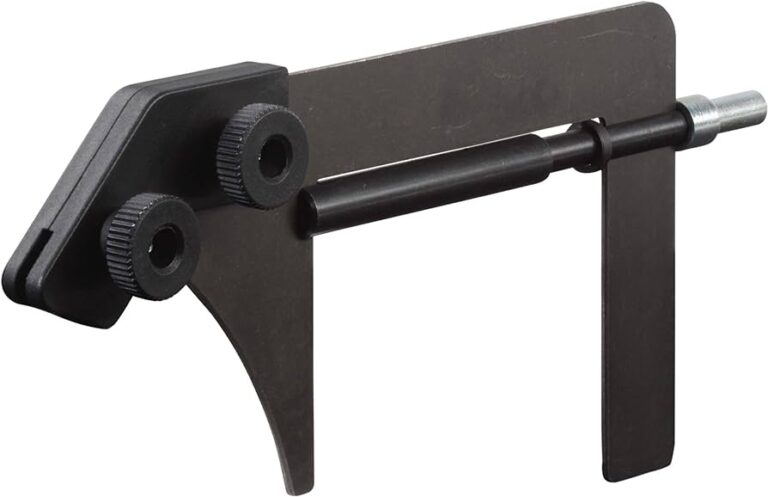
- Tapering Jig: A tapering jig is a specialized tool that provides control and accuracy when making taper cuts. It guides the workpiece along the saw blade at the desired angle.
- Push Sticks or Push Blocks: These tools help keep your hands a safe distance from the saw blade while maintaining control and pressure on the workpiece.
- Measuring Tools: A combination square, ruler, or tape measure are crucial for measuring and marking the desired taper angles on the workpiece.
- Clamps: Clamps are useful for securing the workpiece and the tapering jig, ensuring stability during the cut.
- Sandpaper: After making the taper cut, sandpaper can be used to smooth out any rough edges or imperfections.
By considering these factors, following safety precautions, and using the right tools and accessories, you’ll be well-prepared to tackle taper cuts on a table saw. Remember to practice proper techniques and always prioritize safety when working with power tools.
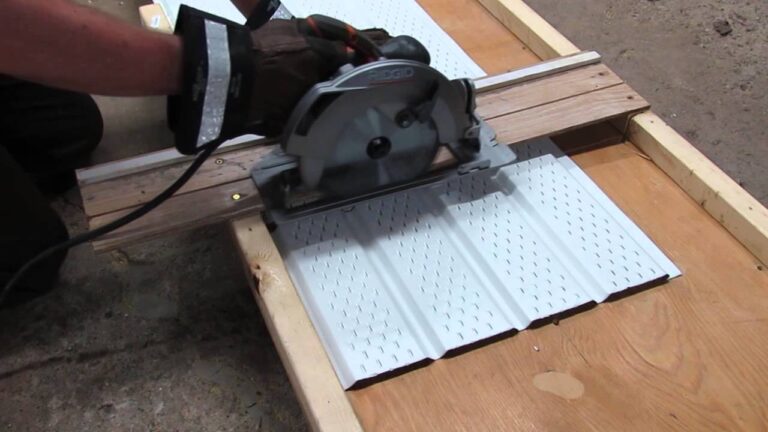
Step-By-Step Guide To Cutting A Taper On A Table Saw
Learn how to cut a taper on a table saw with this step-by-step guide. Discover the techniques and precautions to take for a successful taper cut.
Setting up the table saw for accurate taper cuts:
- Start by ensuring that the table saw is set up on a stable and level surface.
- Attach a rip fence to the table saw and position it parallel to the saw blade.
- Install a tapering jig on the rip fence to control the angle of the taper cut.
- Measure and mark the desired taper angle on the workpiece.
Adjusting the blade angle and height:
- Check that the table saw blade is aligned with the miter gauge slot for precise cuts.
- Adjust the blade angle to match the desired taper angle, using a protractor or angle gauge for accuracy.
- Set the blade height according to the thickness of the workpiece, allowing for a smooth and even cut.
Positioning the workpiece and using a tapering jig:
- Place the workpiece against the rip fence and align it with the tapered edge position on the tapering jig.
- Ensure that the workpiece is firmly held in place on the tapering jig to prevent any movement during the cut.
- Use clamps or hold-downs to secure the tapering jig and workpiece if necessary.
Making the cut and ensuring accuracy:
- Start the table saw and slowly feed the workpiece into the blade, keeping a steady and firm grip.
- Maintain a consistent feed rate as you guide the workpiece along the tapering jig for a smooth and precise cut.
- Pay close attention to the blade and workpiece alignment, making adjustments if needed to ensure accuracy.
- Once the cut is complete, carefully remove the workpiece from the table saw and inspect the taper for any imperfections.
By following this step-by-step guide, you can confidently cut accurate tapers on a table saw. Remember to prioritize safety precautions, such as wearing protective gear and keeping your fingers a safe distance from the blade. Happy taper cutting!
Choosing The Right Type Of Wood For Taper Cuts
Choosing the right wood for taper cuts on a table saw is crucial for achieving precise and clean results. The type of wood selected should have a consistent grain pattern and be free from knots or imperfections, ensuring smoother and more accurate cuts.
Understanding Wood Grain And Its Impact On Taper Cuts
Wood grain plays a crucial role in achieving a clean and precise taper cut on a table saw. Understanding how the grain runs in different wood types helps you select the right material for your project. Here are some important factors to consider when choosing wood for taper cuts:
- Wood grain refers to the direction in which the fibers of the wood run. It can be classified as straight, interlocked, or irregular.
- Straight-grained wood, such as pine or poplar, is ideal for taper cuts. The consistent grain pattern allows the blade to cut smoothly and reduces the likelihood of tear-out.
- Interlocked grain, commonly found in woods like oak or mahogany, can present challenges when cutting taper angles. The alternating grain direction may cause tear-out or splintering.
- Irregular grain, like what you might find in burl or curly maple, can make taper cuts more difficult. The unpredictable grain patterns require careful attention to achieve clean results.
Recommended Wood Species For Different Taper Cut Projects
Choosing the right wood species for your taper cut project can greatly impact the final outcome. Here are some recommendations based on the type of project:
- Furniture Legs:
- Hardwoods such as oak, ash, or walnut are excellent choices for furniture legs due to their durability and stability.
- Straight-grained wood with minimal knots ensures cleaner cuts and a polished look.
- Decorative Trim:
- Softwoods like pine or cedar are often used for decorative trim due to their availability and affordability.
- Straight-grained wood with minimal knots or blemishes allows for precise cuts and a smooth finish.
- Crafts and Small Projects:
- Lightweight and easy-to-work-with woods like cherry, birch, or maple are great for crafts and small projects.
- Select straight-grained pieces for better control over taper cuts and less risk of tear-out.
Remember, the wood species you choose will ultimately depend on the specific requirements of your project. Always consider the desired grain pattern, stability, and ease of cutting when making your selection.
By understanding wood grain and carefully choosing the right wood species, you can enhance the quality of your taper cuts and achieve impressive results on your table saw projects. Happy woodworking!
Proper Maintenance And Setup For Accurate Taper Cuts
Learn how to achieve accurate taper cuts on a table saw through proper maintenance and setup. Discover the techniques to create precise angles without worrying about the limitations of your table saw.
A well-maintained and properly set up table saw is essential for achieving accurate and consistent taper cuts. To ensure your table saw is in optimal condition, follow these regular maintenance tips:
- Clean and lubricate the saw blade: Regularly remove sawdust and debris from the blade and apply a lubricant to keep it running smoothly.
- Check and adjust the blade alignment: Make sure the blade is parallel to the miter slots by using a combination square or a specialized alignment tool.
- Inspect and replace the saw blade: A dull or damaged blade can result in splintered or uneven cuts, so replace the blade if necessary.
- Calibrate the miter gauge: Check the accuracy of the miter gauge and adjust it if needed to ensure precise angle cuts.
- Align the table saw fence: Confirm that the fence is perfectly parallel to the blade by using a straight reference and making adjustments as necessary.
- Verify the position of the blade insert: The blade insert should be perfectly flush with the surface of the table to prevent splintering and accidents.
- Tighten all the fasteners: Regularly check and tighten all the screws, bolts, and nuts on the table saw to maintain stability and prevent vibrations.
- Clean and adjust the table surface: Remove any built-up sawdust or debris from the table and ensure it is flat and level for accurate cuts.
- Inspect the safety features: Check the operation and condition of all safety features, such as the blade guard, riving knife, and anti-kickback pawls.
- Follow manufacturer’s recommendations: Always refer to the manufacturer’s manual for specific maintenance procedures and guidelines for your table saw model.
By following these maintenance tips and keeping your table saw in optimal condition, you’ll be able to achieve precise and clean taper cuts on your projects. Remember to prioritize safety and consult the manufacturer’s recommendations for any additional maintenance requirements.
Troubleshooting Common Issues With Taper Cuts On A Table Saw
Table saw taper cuts can be a common challenge, but with troubleshooting, they can be accomplished. By following these guidelines, you can confidently create tapers on your table saw with ease.
Taper cuts can be a great way to add flair and unique design elements to your woodworking projects. However, they can also present some challenges. In this section, we will address two common issues that you may encounter when making taper cuts on a table saw: tearout and splintering, and inaccurate cuts and alignment issues.
Read on to find out how to overcome these obstacles and achieve clean, precise taper cuts.
Dealing With Tearout And Splintering:
- Use a zero-clearance insert: This type of insert provides support to the wood fibers, reducing the likelihood of tearout and splintering. It eliminates the gap between the blade and the throat plate, ensuring that the wood is fully supported throughout the cut.
- Adjust the blade height: To minimize tearout and splintering, ensure that the blade is only slightly higher than the material being cut. This allows for a clean and controlled entry and exit point, reducing the chances of tearout.
- Utilize a sharp, high-quality blade: A dull or low-quality blade can lead to tearout and splintering. Invest in a high-quality blade with a high tooth count specifically designed for clean cuts. Keep it sharp and replace it as soon as signs of wear appear.
Correcting Inaccurate Cuts And Fixing Alignment Issues:
- Check the blade alignment: A misaligned blade can result in inaccurate cuts and uneven tapers. Use an alignment tool to ensure that the blade is parallel to the miter slot or fence. Adjust the blade accordingly until it is perfectly aligned.
- Verify the fence alignment: If your taper cuts are consistently inaccurate, the problem may lie with the fence. Ensure that the fence is parallel to the blade and that it locks securely in place. Make any necessary adjustments to achieve precise cuts.
- Use a tapering jig: A tapering jig can help guide your workpiece through the cut, ensuring accuracy and consistency. It provides a secure and stable platform, reducing the risk of errors caused by manual manipulation.
- Take your time and make test cuts: Practice makes perfect. Before committing to your final piece, make test cuts on scrap material to verify the accuracy and alignment. Adjust as needed until you are confident in your setup.
By employing these troubleshooting techniques, you can overcome common issues associated with taper cuts on a table saw. Remember to prioritize safety at all times and continue to refine your skills through practice and experimentation. With patience and persistence, you will achieve exceptional taper cuts that elevate your woodworking projects to the next level.
Frequently Asked Questions On Can I Cut A Taper On A Table Saw?
How Do You Make A Tapered Leg On A Table Saw?
To make a tapered leg on a table saw, follow these steps: mark the desired taper on the leg, adjust the table saw fence, make multiple shallow cuts at different heights, and gradually adjust the fence until the desired taper is achieved.
How Do You Make A Taper Cut Table Saw Jig?
To make a taper cut table saw jig, follow these steps: 1. Start by measuring the desired taper angle on the workpiece. 2. Use a straight board to create the base of the jig. 3. Attach a fence to the base, ensuring it is perpendicular to the blade.
4. Secure the workpiece against the fence and make the taper cut using the table saw. Remember to always prioritize safety and wear appropriate protective gear when operating power tools.
How Do You Cut A Taper On A Thick Board Using A Tablesaw?
To cut a taper on a thick board using a table saw, follow these steps: Set the saw blade to the desired angle. Position the board against the table saw fence. Push the board through the blade, applying steady pressure.
Repeat until the desired taper is achieved.
What Not To Do On A Table Saw?
Do not wear loose clothing or jewelry that can get caught in the saw. Avoid standing directly behind the saw blade. Never remove safety guards or make adjustments to the saw while it is running. Do not cross-cut small pieces of wood without a push stick to keep your fingers safe.
Conclusion
Cutting a taper on a table saw can be a useful technique for achieving angled cuts in woodworking projects. By following the right steps and using the appropriate tools, you can create precise and smooth tapers to add depth and interest to your work.
Remember to always prioritize safety measures, such as using push sticks and wearing protective gear, to avoid accidents during the cutting process. With practice and patience, anyone can learn to cut tapers on a table saw and enhance their woodworking skills.
So, whether you’re a beginner or an experienced woodworker, don’t hesitate to explore the possibilities of taper cuts and unleash your creativity in your future projects. Happy sawing!