How Do You Miter Corners Without a Table Saw?
To miter corners without a table saw, use a miter box and a hand saw. This simple technique, requires few tools and yields precise results.
Introductions are a crucial part of any article or blog post as they provide a concise overview of the topic to the readers. In woodworking, one common challenge is mitering corners without a table saw. While a table saw is typically the go-to tool for making accurate miter cuts, not everyone may have access to it.
However, there is a solution! By utilizing a miter box and a hand saw, you can achieve clean and precise miter cuts without the need for expensive machinery. We will guide you through the process, step by step, so you can master the art of mitering corners with ease. So, let’s dive in and discover the wonders of mitering corners without a table saw!
Essential Tools For Mitering Corners Without A Table Saw
Mitering corners is an essential skill in woodworking and carpentry, allowing for seamless and professional-looking joints. While a table saw is often the go-to tool for this task, not everyone has access to one. Fortunately, there are alternative tools and techniques that can achieve the same precision and accuracy. In this article, we will explore the essential tools for mitering corners without a table saw.
Hand saws and miter boxes for manual mitering
When it comes to manual mitering, hand saws and miter boxes are indispensable tools. A hand saw is a versatile tool that can be used for various woodworking tasks, including cutting precise angles for mitered corners. Paired with a miter box, which is a guide that helps to hold the workpiece securely at the desired angle, achieving accurate mitered cuts becomes easier.
Using a hand saw and miter box combo involves placing the workpiece in the miter box and aligning it with the desired angle. The miter box acts as a guide for the saw, ensuring straight and precise cuts. With some practice and patience, this method can give you excellent results.
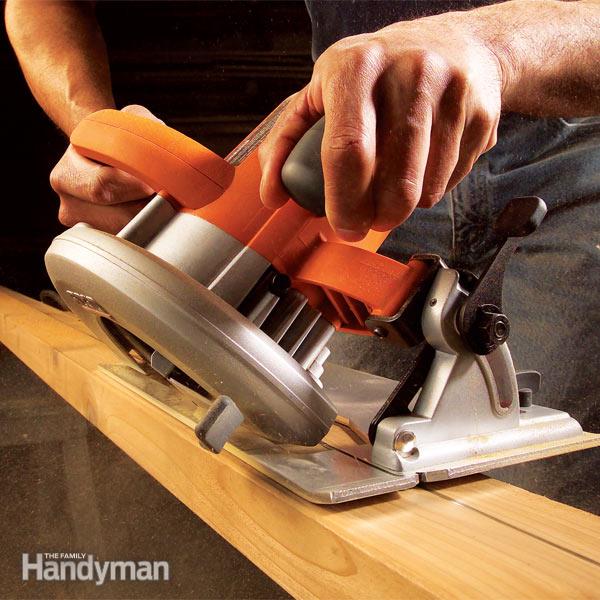
Circular saws and miter guides for power tool mitering
For those who prefer power tools, circular saws are a popular choice for mitering corners. These handheld cutting tools can make quick work of mitered cuts. When combined with a miter guide, which acts as a fence for the saw, achieving accurate angles becomes a breeze.
Using a circular saw and miter guide involves setting the desired angle on the guide and securely clamping it in place. The saw is then guided along the miter guide, cutting through the workpiece to create the mitered corner. This method is particularly effective for larger projects or when precision is of utmost importance.
Choosing the right tools based on project requirements
When determining which tools to use for mitering corners without a table saw, it’s important to consider the specific requirements of your project. Different tools excel in different situations, so understanding your needs will ensure the best results. Here are a few factors to consider when making your decision:
- The size and thickness of the workpiece
- The type of material being cut (e.g., wood, plastic, metal)
- The desired level of precision
- Your personal comfort and familiarity with the tools
By taking these factors into account, you can make an informed decision about which tools to use for mitering corners without a table saw, resulting in beautifully crafted joints that are both sturdy and visually appealing.
Hand Tools For Mitering Corners
When it comes to mitering corners without a table saw, hand tools can be the perfect solution. Whether you are working on a woodworking project or trying to find an alternative to power tools, hand tools offer precision and affordability.
We will explore the different options available to you, including hand saws and miter boxes. We will also provide a step-by-step guide on how to cut miter joints using these tools. Let’s dive in!
Hand saws: Types and recommendations
If you prefer the control and tactile feel of hand tools, a hand saw is a great option for cutting miter joints. There are various types of hand saws that you can use for mitering corners. Here are a few popular ones:
| Saw Type | Features | Recommendation |
|---|---|---|
| Crosscut Saw | A versatile saw that cuts across the wood grain. | Stanley 15-Inch Fat Max Crosscut Saw |
| Miter Saw | Specifically designed for making accurate miter cuts. | Irwin Tools 2014450 ProTouch Fine Cut |
| Japanese Pull Saw | A thin-profile saw with a pull stroke for precision and control. | Shark Corp 10-2312 Carpentry Saw |
It’s worth noting that the choice of saw will depend on the specific project and your personal preference. Make sure to choose a saw with sharp teeth for clean and smooth cuts.
Miter boxes: Features and usage tips
If you want to achieve consistent and accurate miter cuts, miter boxes can be a valuable tool. Miter boxes are designed to hold your workpiece securely and guide your saw along the desired angle. Here are some features to look for in a miter box:
- Material: Look for a miter box made of sturdy and durable material, such as aluminum or high-quality plastic.
- Angle Adjustments: Ensure that the miter box allows you to make precise angle adjustments, commonly ranging from 45 to 90 degrees.
- Clamps or Braces: Miter boxes with clamps or braces can hold your workpiece securely, preventing any unwanted movement during cutting.
When using a miter box, it’s essential to follow these usage tips for optimal results:
- Secure your workpiece: Use clamps or braces to hold your workpiece firmly in place within the miter box.
- Mark your cutting line: Use a pencil or a marking knife to mark the precise cutting line on your workpiece.
- Align your saw: Position your saw within the designated slots of the miter box, ensuring proper alignment with your cutting line.
- Make your cut: With a steady hand, guide your saw along the sawing slot, cutting through the material in a smooth, controlled motion.
- Check for accuracy: After the cut, double-check the miter joint for accuracy and make any necessary adjustments.
Step-by-step guide to cutting miter joints with hand tools
Now that you have an understanding of hand saws and miter boxes, let’s walk through a step-by-step guide on how to cut miter joints using these tools:
- Measure and mark: Begin by measuring and marking the desired angle on your workpiece, using a protractor or an angle-finding tool.
- Secure your workpiece: Place your workpiece securely in the miter box, ensuring it is snug against the appropriate angle slots.
- Align your saw: Position your hand saw in the miter box slots, aligning it with the marked cutting line on your workpiece.
- Cut with precision: Using a controlled, back-and-forth motion, start cutting through the material. Take your time and let the saw do the work.
- Check the fit: Once the cut is complete, fit the mitered ends together to ensure a tight joint. Make any necessary adjustments to achieve a perfect fit.
With practice, you will gain confidence in using hand tools for mitering corners without a table saw. Remember to prioritize safety by wearing appropriate protective gear and keeping a steady hand during the cutting process.
Alternative Techniques For Mitering Corners
Mitered corners can add a touch of elegance and sophistication to any woodworking project. While a table saw is commonly used for creating precise and clean miter cuts, not everyone has access to this tool.
However, there are alternative techniques that can be used to achieve accurate mitered corners without a table saw. In this article, we will explore three such techniques: the coping method, biscuit joinery, and splined miter joints.
Coping method: Utilizing a coping saw and coping style miter joint
When it comes to mitering corners without a table saw, one effective technique is the coping method. This method involves using a coping saw, which is a small, versatile hand tool, to create a coping style miter joint. The coping saw allows you to easily cut along the profile of the molding or trim, creating a snug fit between the two adjoining pieces.
To use the coping method, follow these steps:
- Measure and mark the desired angle for the miter cut on the trim piece.
- Secure the trim piece in a vise or clamp it down so that it remains stable during the cutting process.
- Use a coping saw to carefully cut along the profile of the trim, following the marked angle.
- Smooth out any rough edges or imperfections using sandpaper or a file.
- Fit the coped end of the trim piece over the adjoining piece, ensuring a tight and seamless joint.
Biscuit joinery: Using biscuits to reinforce miter joints
If you’re looking for a sturdy and reliable method to strengthen miter joints, biscuit joinery might be the answer. Biscuits are small, oval-shaped wooden pieces that can be inserted into slots created with a biscuit joiner or a router. These biscuits help align and reinforce the joint, providing added stability and strength.
To incorporate biscuit joinery into your mitering process, follow these steps:
- Measure and mark the locations for the biscuits on the mitered edges of the workpieces.
- Use a biscuit joiner or a router with a biscuit-cutting bit to cut slots at the marked locations.
- Apply glue to the slots and insert the biscuits, ensuring they fit snugly.
- Join the mitered edges together, pressing firmly to ensure a secure bond.
- Allow the glue to dry completely before sanding or finishing the project.
Splined miter joints: Creating strong and visually appealing corners
Splined miter joints are not only robust and durable but also visually appealing. This technique involves adding a spline, which is a thin strip of wood, into a slot that runs the length of the miter joint. The spline not only reinforces the joint but also adds an aesthetic element to the corners.
To create splined miter joints, follow these steps:
- Measure and mark the location of the spline slot on the mitered edges of the workpieces.
- Use a table saw fitted with a dado blade or a router with a straight-cutting bit to create the spline slot.
- Cut a matching spline from a piece of hardwood or other suitable material.
- Apply glue to the spline slot and insert the spline, ensuring it fits securely.
- Align the mitered edges and press them together, making sure the spline is centered within the joint.
- Allow the glue to dry thoroughly before sanding or finishing the project.
While a table saw may be the go-to tool for mitering corners, there are alternative techniques that can produce equally impressive results. Whether you choose to utilize the coping method, biscuit joinery, or splined miter joints, these techniques can help you achieve clean, precise, and visually appealing mitered corners without the need for a table saw.
Credit: www.woodmagazine.com
Tips For Achieving Accurate Miter Joints
When it comes to creating seamless and precise mitered corners without a table saw, there are several key factors to consider. From proper measurement and marking techniques to clamping and securing workpieces for precision, and even sanding and trimming for seamless finish, each step plays a crucial role in achieving accurate miter joints. In this article, we will explore these essential tips in detail.
Proper Measurement and Marking Techniques
Accurate measurement and marking are the foundation of achieving perfect miter joints. Utilizing measuring tools such as a tape measure, square, or angle finder are vital to ensure precise angles. Start by measuring the length of each side that requires a miter cut, and calculate the angle needed for a perfect joint.
Once you have determined the correct measurement and angle, mark the workpiece using a pencil or marking knife. It is crucial to make clear and visible marks to ensure the accuracy of the cut. Consider using a miter gauge or protractor to assist with the marking process, particularly for complex angles.
Clamping and Securing Workpieces for Precision
Securing the workpieces properly is essential to maintain stability and accuracy throughout the cutting and joining process. Ensure that all workpieces are securely clamped to a stable work surface. This will prevent any unwanted movement or shifting, resulting in precise miter joints.
Consider using woodworking clamps or corner clamps to keep the workpieces in place. These clamping tools provide stability and ensure that the angles remain consistent during the cutting and joining process.
Sanding and Trimming for Seamless Mitered Corners
After the miter joints are cut and joined, it is important to sand and trim the corners for a seamless finish. Sanding helps to smooth any rough edges or imperfections, allowing for a flush and seamless joint. Use sandpaper with various grits, starting with a coarse grit and gradually moving to a finer grit for a smooth and polished look.
Trimming the excess length or material from the mitered corners is also crucial for achieving a clean and professional finish. Use a hand saw or a powered trim router to carefully trim any excess material without disturbing the joint. Take your time and make precise cuts to ensure the corner looks seamless and well-fitted.
| Key tips for achieving accurate miter joints: |
|
Finishing And Fine-Tuning Mitered Corners
itered corners give a polished and professional look to woodworking projects. But what do you do when you don’t have a table saw to create those perfect 45-degree angles? In this section, we will explore how you can manually cut mitered corners and then focus on the crucial step of finishing and fine-tuning those corners to achieve that seamless and beautiful look.
Filling gaps and imperfections in the joints
When working with mitered corners, it is common to encounter small gaps or imperfections in the joints. These gaps can disrupt the visual appeal of your project and compromise its structural integrity. To fix this, follow these steps:
- First, assess the size of the gap or imperfection. Small gaps can be filled with wood filler, while larger gaps may require more intensive repairs.
- Prepare the wood filler by following the manufacturer’s instructions. Apply the filler using a putty knife, ensuring it fills the entire gap.
- Smooth out the filled area with a putty knife or a fine-grit sandpaper. This will create a seamless transition between the mitered joint and the filler.
- Allow the filler to dry completely and then lightly sand the area to remove any excess filler and achieve a smooth and even surface.
Applying wood glue and reinforcement techniques
Wood glue is essential for strengthening mitered joints and preventing them from shifting over time. To ensure a strong and durable connection, follow these steps:
- Apply wood glue to both mitered surfaces using a small brush or a toothpick. Make sure to evenly spread the glue to cover the entire mitered joint.
- Join the mitered corners together, applying slight pressure to ensure a tight bond.
- Consider reinforcing the joint with additional techniques such as clamping or using corner braces. These techniques will provide added stability and prevent the corners from separating.
- Wipe off any excess glue with a damp cloth or sponge immediately to avoid leaving visible residue on your project.
Sanding, staining, and achieving a professional finish
To achieve a professional finish on your mitered corners, follow these final steps:
- Start by sanding the entire project, including the mitered corners, with progressively finer sandpaper grits. This will smooth out any rough edges and imperfections left from the cutting and filling process.
- After sanding, wipe the project clean with a damp cloth or tack cloth to remove any dust or debris.
- If staining your project, carefully apply the stain to the entire wooden surface, including the mitered corners, using a brush or rag. Follow the stain manufacturer’s instructions for best results.
- Allow the stain to dry completely, and then apply a clear finish such as lacquer or varnish to protect the wood and enhance its natural beauty.
By following these steps for filling gaps, applying wood glue, and achieving a professional finish, you can ensure that your mitered corners look flawless and add a touch of elegance to your woodworking projects. Remember, attention to detail and patience are key in achieving beautiful mitered corners without the need for a table saw.
Frequently Asked Questions
What Can I Use If I Don’T Have A Miter Saw?
If you don’t have a miter saw, you can use alternative tools like a circular saw with a miter box, a hand saw with a miter box, or a table saw with a miter sled. These options allow you to make accurate angled cuts without a dedicated miter saw.
How Do You Cut Long Miters Without A Table Saw?
To cut long miters without a table saw: Use a miter box and a hand saw with a fine-tooth blade. Secure your workpiece inside the miter box, align the saw with the desired angle, and make the cut using controlled and even strokes.
How Do You Cut Mitres By Hand?
To cut mitres by hand, measure and mark the desired angle on the material. Use a mitre box or guide to hold the material securely. Cut along the marked lines using a hand saw or coping saw, applying steady pressure.
Sand or file the edges for smoothness and precision.
Conclusion
Mastering the art of mitering corners without a table saw opens up a world of possibilities for DIY enthusiasts. By using alternative tools and techniques, you can achieve clean and precise corners in your woodworking projects. From coping saws to miter boxes, there are various options to choose from.
Remember to practice and experiment to find the method that works best for you. With perseverance and creativity, you can create professional-looking mitered corners without the need for a table saw. Happy woodworking!