How to Cut a 225 Degree Angle Without a Miter Saw?

To cut a 225-degree angle without a miter saw, use a protractor and hand saw or circular saw. Mark the angle on your workpiece with the protractor, then carefully cut along the line with your saw.
Behind the precision of woodworking and construction projects lies the crucial skill of cutting exact angles. While a miter saw is a go-to tool for many carpenters and DIY enthusiasts, it’s not the only method for achieving sharp, accurate cuts.
Whether you’re dealing with trim work or custom projects, knowing how to measure and execute a 225-degree angle cut using basic tools is essential. This knowledge allows for versatility in your work, especially when access to a miter saw is not possible. Mastering manual angle cuts not only enhances your problem-solving skills but also adds to your repertoire of craftsmanship techniques. In the following guide, we’ll explore a step-by-step method to achieve this without the need for specialized power tools, ensuring your project continues seamlessly.
Introduction To Precision Angle Cutting
Crafting precision angles in woodworking and construction is an art that requires not only skill but also the right technique. Understanding how to cut a 225-degree angle without a miter saw is an essential skill for those who either do not have access to this tool or prefer to rely on more traditional methods. Whether you are a seasoned professional or a DIY enthusiast, learning to cut angles accurately by hand can open a new realm of possibilities in your projects. Let’s delve into the world of precise angle cutting, exploring methods that can ensure your craftsmanship stands tall.
Understanding Angle Measurements Beyond The Standard Miter Saw
Angle measurements often extend beyond the 0 to 180 degrees typically offered by a standard miter saw. While most common angles in woodworking seem well-accommodated by this range, some projects demand greater flexibility. Cutting a 225-degree angle is one such task that stretches beyond the miter saw’s capabilities but is still within the purview of precise manual cutting.
To tackle angles like these without a miter saw, one must first comprehend the supplementary and complementary angles; in essence, a 225-degree angle must be approached as the supplement of a 135-degree angle. Moving past the confinement of a miter saw requires a clear understanding of withal angles, their interrelation, and effective method adaptation.
The Significance Of Cutting A 225 Degree Angle In Woodworking And Construction
Cutting a precise 225-degree angle plays a pivotal role in both woodworking and construction realms. Complex projects, such as specialty joinery, custom framing, or decorative trims, can call for such uncommon angles. The ability to cut this angle with accuracy ensures tight-fitting joints and corners, reflecting professionalism and mastery in the craft. Achieving such precision without the aid of a miter saw challenges traditional techniques and spotlights the artisan’s versatility.
Techniques to accurately measure and cut this obtuse angle range from using a protractor and a sturdy T-bevel to drawing the angle with precision tools and sawing manually. Exploring alternative methods can be incredibly rewarding, as it not only enhances one’s skill set but also exudes a sense of self-sufficiency and proficiency in tackling diverse woodworking challenges.

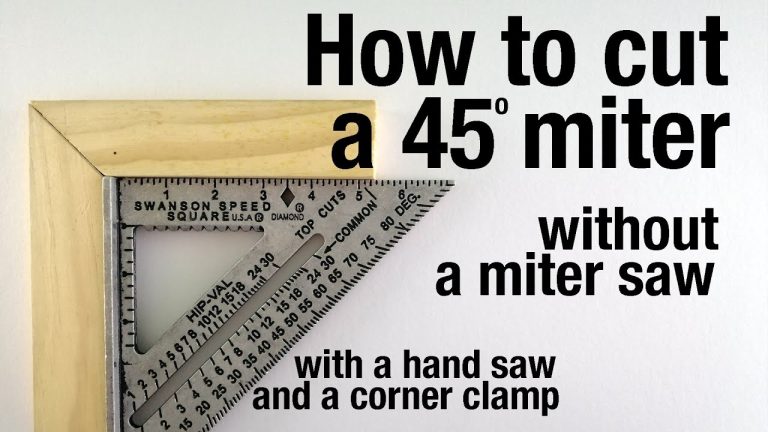
Credit: milescraft.com
Alternative Tools For Cutting A 225 Degree Angle
When it comes to woodworking or any project requiring precise cuts, not having a miter saw at hand might seem like a hurdle. But worry not, a 225-degree angle, a non-standard angle that most miter saws cannot achieve directly, can still be cut with precision using a few alternative tools. Perfect for those intricate projects that demand an obtuse angle beyond the typical 45 or 90 degrees, the methods below provide practical solutions for achieving that elusive 225-degree cut.
Using A Protractor And Hand Saw For Manual Cutting
A manual approach involves using a protractor and hand saw for meticulous cutting. Start by marking your material with the desired angle. Here’s a step-by-step guide:
- Place the protractor on the edge of the material.
- Mark a dot at the 225-degree measurement.
- Draw a line from the edge to the dot, creating a 225-degree reference line.
- Align the hand saw with the line, and secure the material if necessary.
- Proceed to saw along the line, taking care to maintain the angle.
This method requires patience and a steady hand, but can yield highly accurate results without the need for power tools.
Circular Saw Method: Adjusting And Cutting
For a power tool alternative, a circular saw is an excellent choice. Although typically used for straight cuts, with the correct adjustments, it can handle the 225-degree challenge admirably:
- Adjust the circular saw to align with the 225-degree mark on a protractor.
- Clamp down the material to ensure stability during the cut.
- Align the saw’s blade with the marked line on the material.
- Carefully execute the cut by following the line, maintaining a firm grip on the saw.
Ensure the blade is sharp and suitable for the material being cut to prevent any tear-out or uneven edges.
Creating A Custom Jig For Accurate 225 Degree Angle Cuts
If repetitive, precise 225-degree cuts are needed, creating a custom jig might be the ideal solution. Use a protractor to mark the angle onto a piece of scrap wood or plywood to serve as a template guide. Here’s what to do:
- Transfer the 225-degree angle onto the jig material.
- Cut the angle on the jig precisely using a saw or jigsaw.
- Once the jig is created, align it with the material you intend to cut.
- Secure the jig in place to serve as a stable guide for the saw.
- Use the edge of the jig to guide the saw blade and execute the cut.
This approach not only provides consistency for multiple cuts but also significantly reduces the margin of error by offering a solid reference for the saw to follow.
With the right tools and techniques, cutting a 225-degree angle without a miter saw is not just possible but also highly efficient. Whether using manual or power tools, each of these methods ensures precision for an angle that might initially seem daunting to tackle. Remember to always take necessary safety precautions, such as wearing eye protection and following tool-specific safety guidelines while performing any cuts.
Step-by-step Guide To Cutting A 225 Degree Angle
Welcome to our step-by-step guide on how to cut a 225-degree angle without a miter saw. Whether you’re an experienced craftsman or looking to tackle a DIY project that requires precision, mastering this skill is essential for creating seamless joints and professional-looking results. We’re about to break down the process into manageable steps to help you achieve that perfect cut, no miter saw needed!
Measuring And Marking The Workpiece
The first step in achieving an accurate cut is precise measurement and marking. Here’s how to ensure you have the angle laid out correctly:
- Choose the right tools: A reliable square, a protractor, and a sharp pencil or marking tool are essential.
- Determine the complementary angle: Since a circle contains 360 degrees, subtract your desired angle from 360. For a 225-degree angle, the complementary angle is 135 degrees.
- Mark the angle: Use the protractor to measure out 135 degrees on your workpiece. Mark the endpoint of this angle with a sharp pencil.
- Draw the cut line: Align your square with the marked point and the corner of the workpiece to draw a straight line for the cutting path.
Securing The Material And Safety Precautions
Before executing the cut, it’s critical to secure the material and take necessary safety measures:
- Secure the workpiece: Use clamps or a vise to firmly attach the material to your work surface.
- Don eye protection: Always wear safety goggles to protect against dust and debris.
- Clear the area: Ensure the cutting area is free of obstructions and loose items that could interfere with the cutting process.
Executing The Cut: Techniques And Tips For Precision
With the workpiece marked and secured, it’s time to focus on executing the cut with precision:
- Select the appropriate saw: A hand saw with a fine-toothed blade is ideal for the job.
- Start the cut: Position the saw on the marked line, starting at the corner of the angle. Cut slowly, following the line closely to maintain accuracy.
- Maintain the blade’s position: Keep the saw blade perpendicular to the workpiece to ensure a straight cut.
- Finalize with a file: After cutting, use a fine file or sandpaper to smooth the edges and perfect the angle.
Mastery of these techniques will allow for a sophisticated approach to projects that require non-standard angles, ensuring you produce clean, sharp results every time.

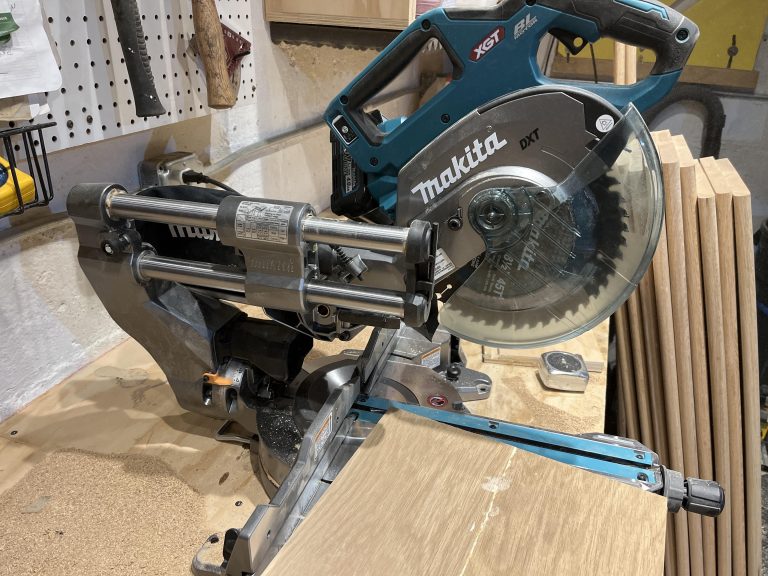
Credit: www.amazon.com
Fine-tuning And Troubleshooting
Cutting a precise 225-degree angle can be challenging without the luxury of a miter saw. Even the most skilled woodworkers may encounter the need for some fine-tuning and troubleshooting. It’s not just about making the cut; it’s about refining the work to ensure a perfect fit. Here’s how to address the final touches and solve common problems that may arise.
Sanding and Perfecting the Angle Post-CutSanding And Perfecting The Angle Post-cut
After the initial cutting process, the edges, more often than not, require some fine-tuning. This is where sanding steps in as your best friend. It’s crucial to achieve the smooth finish and adjust the angle slightly if needed.
- Start with a coarse sandpaper to remove larger imperfections.
- Gradually move to finer grits to refine the edge and prevent gouges.
- Check the angle frequently with a protractor to avoid over-sanding.
- Finish with a very fine sandpaper for a polished look.
Sanding not only improves the fit but also prevents splintering when the pieces are joined.
Addressing Common Issues: Overcuts and AdjustmentsAddressing Common Issues: Overcuts And Adjustments
Sometimes, the saw may drift past the intended line, resulting in an overcut. These missteps can be frustrating but are not insurmountable.
To remedy overcuts:
- Fill in the overcut with wood filler if the gap is minimal.
- Allow the filler to dry as per the manufacturer’s instructions, then sand it down.
- If the cut is significantly larger, consider attaching a new piece of wood and recutting the angle.
Adjustments might also entail re-measuring and recutting the piece entirely if the angle is notably off.
Using Angle Finders for Verification and AdjustmentsUsing Angle Finders For Verification And Adjustments
An angle finder is an invaluable tool for not only initial measurements but also for post-cut verification and adjustments. With this instrument, you can:
- Confirm the angle immediately after cutting.
- Adjust the tool as necessary for subsequent cuts.
- Use it to guide your sanding for heightened accuracy.
Utilizing an angle finder helps prevent errors, saving time and material. Regular checks throughout the process maintain precision and ultimately lead to a better finished product.
Practical Applications And Project Ideas
Crafting precise angles without the help of a miter saw might seem challenging, but it opens up a realm of creativity and problem-solving skills. Whether you’re an enthusiastic DIYer or a seasoned woodworker, learning how to cut a 225-degree angle by hand can elevate your projects to new levels of precision and innovation. In this segment, we delve into practical applications and project ideas that involve 225-degree angles, and how they contribute to extraordinary design projects, woodworking craftsmanship, and innovative construction.
Incorporating 225 Degree Angles In Design Projects
Aesthetic appeal and functionality fuse when incorporating 225-degree angles into your design projects. These angles can introduce a dynamic element to furniture, create visually striking patterns in tile work, or add a modern twist to picture frames and mirror edges. Through precise hand cuts, unique geometric shapes take form, transforming ordinary objects into conversation pieces.
- Bespoke shelving units
- Angular wall art installations
- Customized frame designs
Examples Of Woodworking Projects Utilizing Acute Angles
Woodworking projects often demand acute angles for both functional and decorative purposes. When a miter saw isn’t within reach, executing a 225-degree cut manually can be a true testament to a woodworker’s skill. Children’s toys, like intricate puzzle pieces, benefit from these unconventional angles. Architectural models, with their complex facets, also require precise acute angle cuts to accurately represent real-world structures.
- Interlocking wooden puzzles
- Detailed dollhouse elements
- Artistic wood sculptures
Innovative Construction Techniques With Non-traditional Angles
In the construction domain, introducing non-traditional angles can lead to innovative building solutions and aesthetically appealing designs. For instance, 225-degree angles may feature in the customization of cabinetry, the assembly of complex trusses, or the crafting of unique window frames. Hand cutting these precise angles becomes not only a necessity but a showcase of masterful craftsmanship.
| Project Type | Application | Benefits |
|---|---|---|
| Custom Cabinetry | Drawer fronts with angular joins | Enhanced visual interest |
| Architectural Framework | Trusses for roofs and overhangs | Structural uniqueness |
| Artistic Structures | Window framing and glass art | Creation of statement pieces |

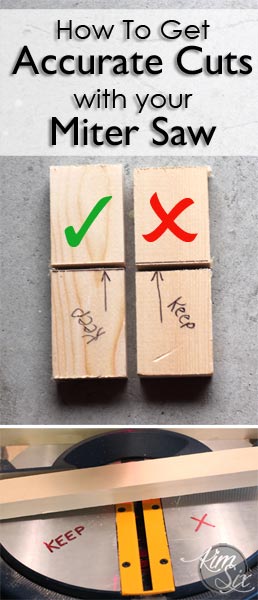
Credit: www.homedepot.com
Frequently Asked Questions For How To Cut A 225 Degree Angle Without A Miter Saw?
How Do You Cut Trim Without A Miter Saw?
To cut trim without a miter saw, use a hand miter box and backsaw for precision. Mark your cutting line, secure the trim with clamps, and saw carefully along the mark. Handheld tools offer an affordable alternative to power saws for small projects.
How Do You Cut An Angle Greater Than 45?
To cut an angle greater than 45 degrees, use a miter saw with an adjustable angle setting. Tilt the blade to your desired angle that exceeds 45 degrees, then make the cut by sliding or chopping, depending on your saw type.
How Do You Cut A Mitre By Hand?
Measure and mark your cutting angle on the material. Secure the material in a mitre box. Use a fine-toothed saw, aligning it with the appropriate slots. Saw with steady, angled strokes. Smooth the edge with sandpaper for a clean finish.
How Do You Cut A 2×4 Angle?
Measure the desired angle on the 2×4 using a speed square. Secure the wood on a stable surface. Guide a circular saw or handsaw along the square to make the angled cut. Always wear safety gear and follow tool instructions for safety.
Conclusion
Crafting a precise 225-degree angle is an achievable task, even in the absence of a miter saw. Using simple geometry, a compass, and a straightedge, DIY enthusiasts can attain accuracy with manual methods. For your next project that demands unconventional cuts, remember these techniques to navigate the challenge successfully and create the perfect angle with confidence and ease.
{ “@context”: “https://schema.org”, “@type”: “FAQPage”, “mainEntity”: [ { “@type”: “Question”, “name”: “How do you cut trim without a miter saw?”, “acceptedAnswer”: { “@type”: “Answer”, “text”: “To cut trim without a miter saw, use a hand miter box and backsaw for precision. Mark your cutting line, secure the trim with clamps, and saw carefully along the mark. Handheld tools offer an affordable alternative to power saws for small projects.” } } , { “@type”: “Question”, “name”: “How do you cut an angle greater than 45?”, “acceptedAnswer”: { “@type”: “Answer”, “text”: “To cut an angle greater than 45 degrees, use a miter saw with an adjustable angle setting. Tilt the blade to your desired angle that exceeds 45 degrees, then make the cut by sliding or chopping, depending on your saw type.” } } , { “@type”: “Question”, “name”: “How do you cut a Mitre by hand?”, “acceptedAnswer”: { “@type”: “Answer”, “text”: “Measure and mark your cutting angle on the material. Secure the material in a mitre box. Use a fine-toothed saw, aligning it with the appropriate slots. Saw with steady, angled strokes. Smooth the edge with sandpaper for a clean finish.” } } , { “@type”: “Question”, “name”: “How do you cut a 2×4 angle?”, “acceptedAnswer”: { “@type”: “Answer”, “text”: “Measure the desired angle on the 2×4 using a speed square. Secure the wood on a stable surface. Guide a circular saw or handsaw along the square to make the angled cut. Always wear safety gear and follow tool instructions for safety.” } } ] }