How to Cut Quarter Round With a Miter Saw?
To cut quarter round with a miter saw, set the saw to a 45-degree angle and secure the molding against the fence before cutting. Ensure the blade’s rotation aligns with the marked cutting line for accuracy.
Trim carpentry requires precision and skill, especially when it comes to cutting quarter round moldings. These small, decorative pieces add a finished look to baseboards and floors, hiding seams and gaps for a polished appearance. Homeowners and DIY enthusiasts often perform this task to update a room or complete flooring projects.
A miter saw, known for its precision and versatility, is the ideal tool for making angled cuts on quarter round trim. This guide focuses on delivering clear-cut instructions to achieve flawless corners and joints that seamlessly fit together, enhancing your room’s aesthetic. With the right tools and techniques, you can master this essential carpentry task, creating professional-looking results even as a beginner.
Introduction To Quarter Round And Miter Saws
Embellishing your home with molding can transform the aesthetic from simple to sophisticated. The quarter round is an essential component of trim work, designed to conceal gaps between the floor and baseboard or to soften the transition at inside corners. Miter saws, powerful tools for accurate cutting, are your best ally in achieving perfect cuts for these types of moldings. This guide will dive into the details of quarter round moldings and miter saws, preparing you for a flawless installation.
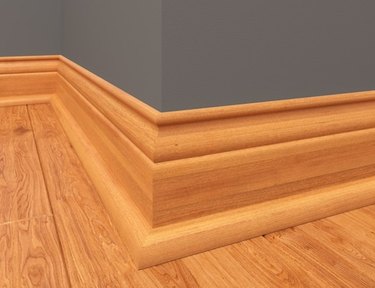
Understanding Quarter Round Moldings
Quarter round moldings are convex moldings with a cross-section that resembles a quarter of a circle. Typically made from wood, MDF, or polyurethane, these moldings:
- Add a finished look to the junction where wall meets floor.
- Cover expansion gaps necessary for hardwood and laminate flooring.
- Can be stained or painted to match the existing trim or flooring.
Using a miter saw for quarter round installation is critical for creating seamless joins at corners. The precision of the saw’s blade makes angled cuts effortless.
The Basics Of Miter Saws
Miter saws specialize in making angular cuts with speed and accuracy. Here’s a quick rundown of their basics:
- Blade Size: Ranging from 7.25 to 12 inches in diameter, larger blades cut wider boards.
- Cut Type: Miter saws make miter, bevel, and compound cuts, adjusting to the angle you need.
- Power: They come in corded and cordless variants, suited to different work environments.
For quarter round moldings, a miter saw’s ability to pivot left or right ensures precise miter cuts for inside and outside corners.
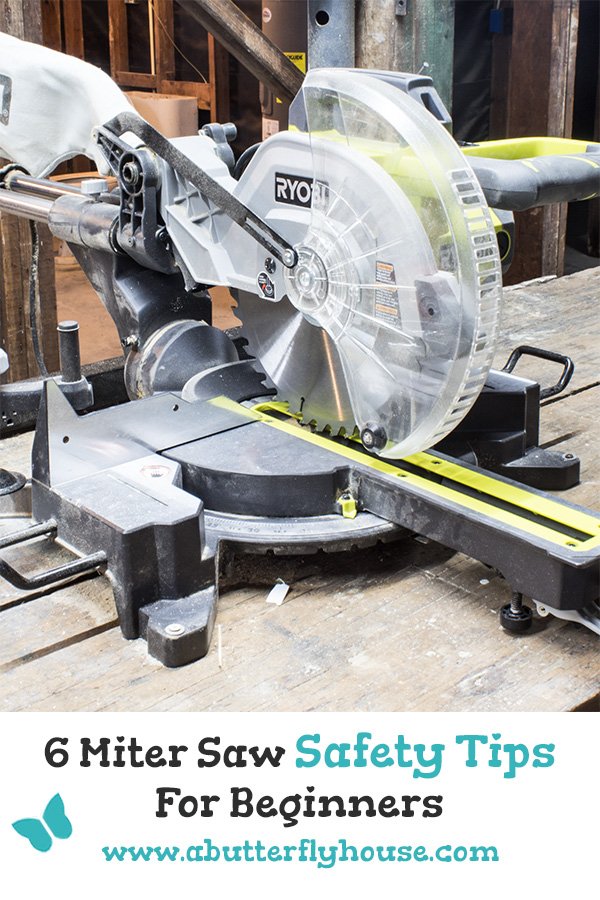
Safety Considerations Before Beginning
Before diving into your trim work, prioritize safety. Follow these steps:
| Equipment | Procedure | Rationale |
|---|---|---|
| Safety Glasses | Always wear during operation. | Protects eyes from flying debris. |
| Ear Protection | Use in noisy environments. | Prevents hearing damage. |
| Dust Mask | Wear if ventilation is poor. | Filters out harmful sawdust. |
| Power Check | Ensure the blade has stopped before making adjustments. | Prevents accidental starts. |
Read the miter saw manual thoroughly before use, as each model has unique features and safety mechanisms.
Armed with this knowledge on quarter round moldings and miter saws, you are well-equipped to start your project. Remember to make safety your top priority and take your time to measure and cut accurately for the best results.

Credit: www.wikihow.com
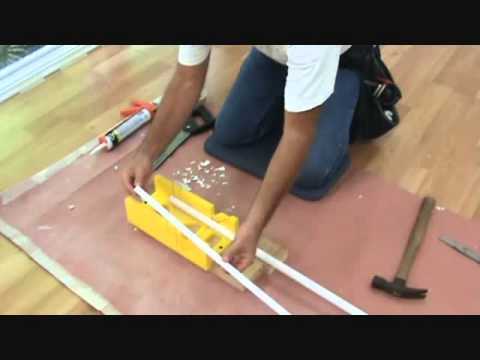
Preparing To Cut Quarter Round
Embarking on a DIY molding project can transform the aesthetics of your space, with quarter round installation being a prime example of this dramatic effect. But first things first, preparing to cut quarter round is a key step that must be done correctly to ensure a crisp, professional finish. Whether you’re a seasoned pro or a novice DIYer, using a miter saw will make the task a whole lot easier. Let’s delve into the initial steps: measuring and marking the quarter round, setting up your miter saw, and selecting the proper saw blade. These preparations will set the foundation for cuts that are accurate, clean, and contribute to that seamless look we all crave in our trim work.
Measuring And Marking The Quarter Round
Accuracy is the golden rule when measuring and marking your quarter round. Begin by taking precise measurements of the wall length where the quarter round will be positioned. Always remember to measure twice to avoid any cutting errors. Once the measurements are confirmed, transfer them onto your quarter round using a pencil and a reliable straight edge or a carpenter’s square. Make sure your marks are visible and exactly on point for the perfect cut.
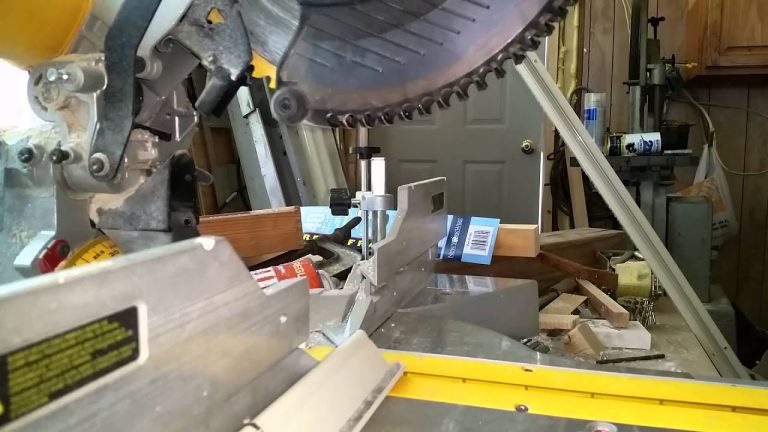
Setting Up The Miter Saw
- Ensure stability: Place your miter saw on a stable, flat surface before starting your project.
- Check for safety: Confirm that all safety guards are in place and that the saw is unplugged while you make adjustments.
- Adjust for angles: For corners, set the miter saw to a 45-degree angle for those perfect miters, or adjust according to the specific angle required for your project.
- Secure the quarter round: Clamp your quarter round to the saw’s fence to ensure it doesn’t move while you’re cutting. This will help prevent any uneven cuts or potential accidents.
Choosing The Right Saw Blade
A crucial component that can make or break the quality of your cut is the saw blade selection. For quarter round, a fine-toothed blade is recommended to produce a smooth, splinter-free edge. Typically, a blade with at least 80 teeth for a 10-inch miter saw, or a comparable tooth count for other sizes, is ideal. Replace any dull blades with sharp ones, as working with a dull blade can be inefficient and dangerous. Also, verify that the blade is appropriate for the material of your quarter round, whether it be wood or a composite material.
Techniques For Cutting Quarter Round With A Miter Saw
Perfectly cutting quarter round molding is a key finishing touch for floor installations, tying together the aesthetics of a room. A miter saw, with its precision and power, is the go-to tool for achieving crisp, clean cuts on this type of trim. Understanding the proper techniques for handling quarter round cuts with a miter saw can transform a daunting task into a straightforward process. From mastering straight cuts to navigating complex angles and curved moldings, each type of cut presents its own set of challenges and tricks.
Making Straight Cuts
Cutting quarter round begins with the basics: straight cuts. These are essential for pieces that will run along flat stretches of wall without any interruptions. Follow these steps:
- Measure the length needed for the quarter round.
- Mark the exact cutting point on the molding with a pencil.
- Ensure the miter saw blade is sharp for a smooth cut.
- Align the quarter round on the saw, holding it firmly against the fence.
- Set the miter saw angle to 0 degrees for a straight cut.
- Cut down through the molding swiftly and confidently.
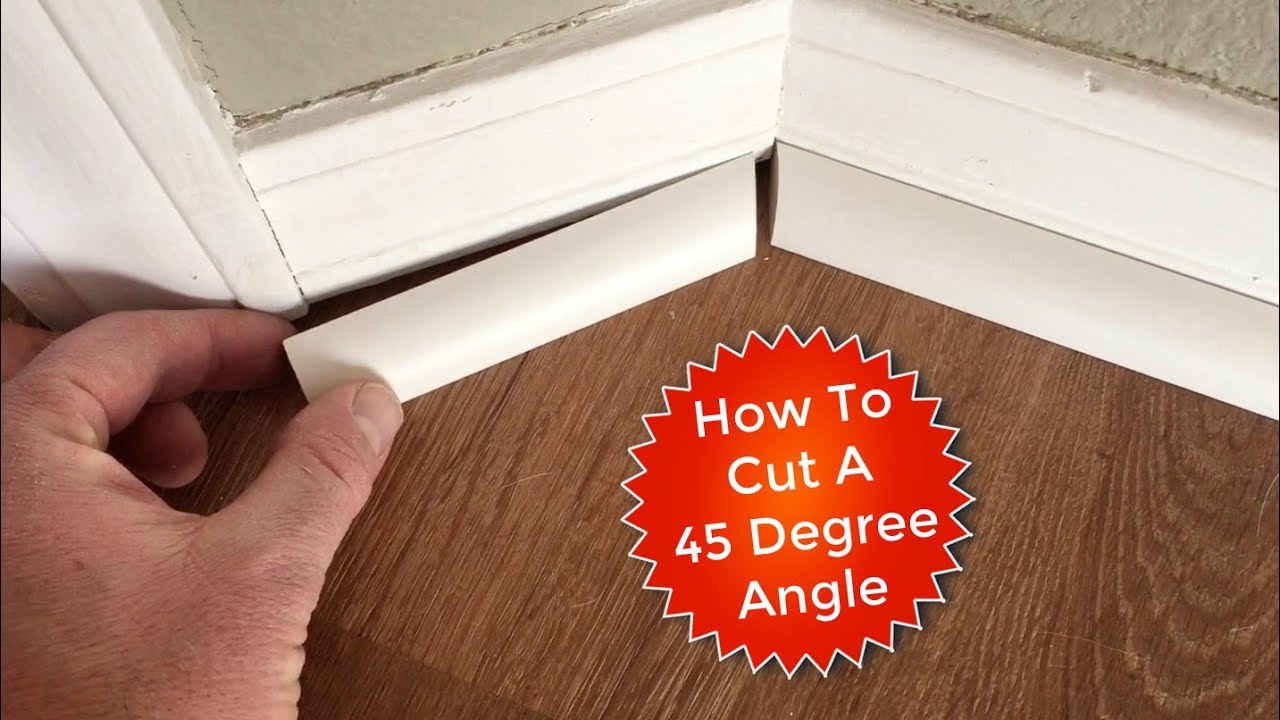
Cutting Inside Corners
Inside corners often intimidate, but with the right technique, a clean fit is achievable. Utilize the miter saw’s capability to cut precise angles:
- Set the saw to a 45-degree angle to match the corner’s profile.
- Position the quarter round as it will install, and make the cut.
- Repeat the process for the adjoining piece, mirroring the angle.
- Test fit both pieces to ensure a tight joint.
Cutting Outside Corners
Working with outside corners? Here’s how to achieve clean mitered edges:
- Determine the angle of the outside corner, typically 90 degrees.
- Divide this angle in half to find the miter angle for each piece, usually setting the saw at 45 degrees.
- Cut one piece with the miter saw blade tilted to the left, and the other tilted to the right.
- Check that the two cut pieces form a perfect corner when joined.
Handling Complex Angles And Curved Moldings
Encountering complex angles and curves can seem challenging. Incorporate these tips for a flawless outcome:
- Use a coping saw for intricate curves and scribe the profile onto the quarter round.
- For non-standard angles, use an angle finder to capture the precise angle needed and set the miter saw accordingly.
- For large curves, consider creating a template and incrementally cutting and testing the fit.
Finishing And Installing Cut Quarter Round
Congratulations on successfully cutting your quarter round molding with a miter saw! It’s time to transform these wood pieces into a polished component of your room’s decor. Finishing and installing cut quarter round is an essential step in ensuring a seamless look and professional outcome. From sanding to securing the pieces in place, we’ll walk you through the necessary techniques to bring your project to completion.
Sanding And Smoothing Cut Edges
The first step in prepping your freshly cut quarter round is to sand the edges. A smooth finish is crucial for a high-quality appearance and for preparing the surface for painting or staining.
- Start with a fine-grit sandpaper to gently smooth away any roughness.
- Focus on the end grains where the saw blade passed through, ensuring they’re free of splinters and uneven textures.
- Wipe down with a clean, dry cloth to remove any residual sawdust.
Painting Or Staining Quarter Round
Before installation, it’s essential to either paint or stain your quarter round to match or complement your baseboards and flooring. This step requires precision to maintain a tidy environment.
- Choose a high-quality paint or stain that matches your design preference.
- Apply with a brush or sponge, ensuring even coverage along the length of the quarter round.
- Allow ample time to dry as per the manufacturer’s instructions before moving onto installation.
Securing Quarter Round To Walls Or Baseboards
The final step is securing the quarter round in place, which will provide the finishing touch to your flooring project.
- Measure and double-check the length of your walls or baseboards to match the prepared quarter round.
- Apply a bead of wood adhesive or caulking to the rear side of the quarter round if additional hold is needed.
- Position the quarter round against the wall or baseboard, making sure it fits snugly and aligns accurately at the corners.
- Using a nail gun or hammer, lightly secure the quarter round with finishing nails, spaced every 8 to 10 inches apart.
- Fill in any nail holes with wood filler, then touch up with paint or stain to maintain a consistent finish.
Tip: For an impeccable finish, use a caulking gun to apply a thin bead of paintable caulk along the top edge of the quarter round where it meets the wall. This will create a fluid transition and conceal any gaps or imperfections.
Troubleshooting & Tips
Cutting quarter round moldings with a miter saw can seem challenging, but with the right techniques and a bit of know-how, you can achieve clean, precise cuts every time. Let’s troubleshoot common issues and explore practical tips to elevate your woodworking game.
Common Mistakes To Avoid
Taking on any cutting project requires attention to detail to avoid mishaps. With quarter round, even minor mistakes can lead to unsightly gaps and wasted materials. Stay vigilant for these blunders to ensure your trim work is flawless.
- Incorrect Measurement: Always measure twice before cutting — an old adage that remains crucial in carpentry.
- Improper Angle Setting: Double-check the angle alignment on your miter saw for accuracy.
- Using Dull Blades: Replace or sharpen the saw blade as a dull one can result in rough, jagged cuts.
- Ignoring Safety Precautions: Never compromise on safety. Wear protective eyewear and follow the saw’s operational guidelines.
- Forgetting to Secure the Material: Secure the quarter round against the miter saw fence to prevent it from moving during the cut.
Maintaining Your Miter Saw For Precision Cuts
Consistently sharp and precise cuts are achievable when you maintain your miter saw. Implement a routine of care to prolong its performance:
| Maintenance Task | Frequency |
|---|---|
| Clean Sawdust | After Each Use |
| Check Blade Sharpness | Monthly or As Needed |
| Lubricate Moving Parts | Bi-annually |
| Inspect Safety Components | Annually |
| Align Blade and Fence | After Blade Change |
Advanced Tips For Professional Results
- Use a Stop Block: Attach a stop block to the miter saw for repeat cuts, ensuring uniform length for multiple pieces.
- Fine-tune with a Sandpaper: After cutting, lightly sand the edges for a smooth finish.
- Implement a Zero Clearance Insert: This custom addition to your miter saw reduces tear-out and supports smaller pieces.
- Experiment with Back-Bevel Cuts: A minor back-bevel on the cut can create a tighter seam when fitting corners.
Credit: www.hunker.com
Credit: m.youtube.com
Frequently Asked Questions Of How To Cut Quarter Round With A Miter Saw?
What Angle Do You Cut Quarter Round?
Cut quarter round molding at a 45-degree angle for inside corners and a 90-degree angle for flat or straight pieces. Use a miter saw for precision.
What Is The Easiest Tool To Cut Quarter Round With?
The easiest tool for cutting quarter round is a miter saw, offering precise and clean cuts. A manual miter box with a handsaw is a good alternative for smaller projects.
How To Cut A 45 Degree Angle With A Miter Saw For Baseboards?
Set your miter saw to a 45-degree angle. Secure the baseboard against the saw’s fence. Hold the board firmly, and make a smooth cut through the material. Repeat for the other end if needed, ensuring the angle direction is correct for the joint.
What Kind Of Nail Gun For Quarter Round?
Use a finish nail gun or brad nailer for installing quarter round molding. Opt for 18-gauge nails that are 1 to 1 ½ inches long.
Conclusion
Mastering the art of cutting quarter round with a miter saw can elevate your DIY projects. With practice and attention to detail, precise cuts are achievable, enhancing your home’s finish. Remember, a sharp blade and proper measurements are key. Embrace each project with confidence, ready to tackle those tricky corners with ease!
{ “@context”: “https://schema.org”, “@type”: “FAQPage”, “mainEntity”: [ { “@type”: “Question”, “name”: “What angle do you cut quarter round?”, “acceptedAnswer”: { “@type”: “Answer”, “text”: “Cut quarter round molding at a 45-degree angle for inside corners and a 90-degree angle for flat or straight pieces. Use a miter saw for precision.” } } , { “@type”: “Question”, “name”: “What is the easiest tool to cut quarter round with?”, “acceptedAnswer”: { “@type”: “Answer”, “text”: “The easiest tool for cutting quarter round is a miter saw, offering precise and clean cuts. A manual miter box with a handsaw is a good alternative for smaller projects.” } } , { “@type”: “Question”, “name”: “How to cut a 45 degree angle with a miter saw for baseboards?”, “acceptedAnswer”: { “@type”: “Answer”, “text”: “Set your miter saw to a 45-degree angle. Secure the baseboard against the saw’s fence. Hold the board firmly, and make a smooth cut through the material. Repeat for the other end if needed, ensuring the angle direction is correct for the joint.” } } , { “@type”: “Question”, “name”: “What kind of nail gun for quarter round?”, “acceptedAnswer”: { “@type”: “Answer”, “text”: “Use a finish nail gun or brad nailer for installing quarter round molding. Opt for 18-gauge nails that are 1 to 1 ½ inches long.” } } ] }