How to Cut Wood at an Angle With a Table Saw?

To cut wood at an angle with a table saw, set the saw blade to the desired angle and carefully guide the wood through the blade. Now let’s dive into the process of how you can effectively cut wood at different angles using a table saw.
Table saws are versatile tools that can make precise angled cuts on wood, allowing you to create bevels, miters, and other angled cuts for various woodworking projects. By following a few simple steps, you can easily cut wood at an angle with a table saw.
We will discuss the necessary steps and safety precautions to ensure accurate and safe angled cuts. So, let’s get started and master the technique of cutting wood at an angle with a table saw.

Credit: www.wikihow.com
Understanding The Basics Of Wood Angles And Table Saw Setups
When it comes to woodworking, understanding how to cut wood at an angle is a fundamental skill. Whether you’re working on furniture, cabinetry, or even simple DIY projects, being able to create precise angle cuts is essential for achieving the desired look and functionality. In this article, we’ll dive into the basics of wood angles and table saw setups, exploring the different wood angles and their applications, the importance of accurate angle cuts, and the necessary tools and materials for angle cutting.
Different wood angles and their applications
Woodworking involves various angles that can vastly change the appearance and purpose of the finished product. Here are some of the commonly used wood angles and their applications:
| Angle | Application |
|---|---|
| 90 degrees | This is the most basic angle and is commonly used for creating square cuts, such as assembling furniture, constructing frames, and making box joints. |
| 45 degrees | The 45-degree angle is often used for creating miter joints, commonly found in picture frames, moldings, and corners of furniture. |
| Beveled angles | Beveled angles are achieved by tilting the table saw blade. They are often used for creating chamfered edges, decorative moldings, and tapered furniture legs. |
Importance of accurate angle cuts
Accurate angle cuts are crucial in woodworking for several reasons:
- Aesthetics: Precise angles contribute to the overall look and visual appeal of the finished piece. Whether it’s a perfectly aligned miter joint or a clean beveled edge, accurately cut angles elevate the quality of the woodworking project.
- Functionality: Angle cuts play a significant role in enhancing the functionality and structural integrity of the final product. For instance, accurately cut angles are critical for creating joints that fit snugly, ensuring long-lasting stability.
- Professionalism: Precision in angle cuts reflects the level of craftsmanship and attention to detail. Whether you’re a hobbyist or a professional woodworker, accurate angle cuts are essential for achieving professional-looking results.
Necessary tools and materials for angle cutting
To successfully cut wood at an angle with a table saw, you’ll need the following tools and materials:
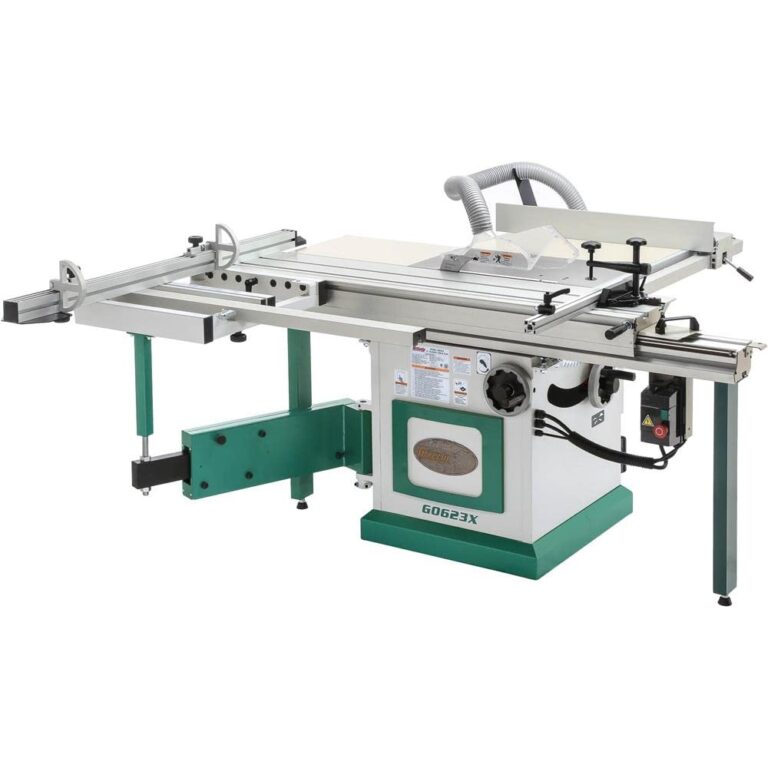
- Table saw: An essential tool for making accurate angle cuts. Ensure that your table saw is properly calibrated and adjusted for precise measurements.
- Miter gauge: A tool that helps guide your wood through the table saw at a specific angle. Most table saws come with a miter gauge, but you may consider investing in a high-quality aftermarket gauge for more precise cuts.
- Angle measuring tools: Reliable angle measuring tools, such as a protractor or an adjustable bevel gauge, are essential for accurately setting up the desired angles on both your miter gauge and table saw.
- Safety equipment: Never overlook safety when working with power tools. Make sure to wear safety goggles, hearing protection, and proper clothing to protect yourself from potential accidents.
By understanding the different wood angles, the importance of accurate cuts, and having the necessary tools and materials, you’ll be well-equipped to cut wood at various angles using a table saw. Practice proper safety measures, take your time, and enjoy the process of creating precise and beautiful woodworking projects.
Preparing The Table Saw For Angle Cuts
Before you can successfully cut wood at an angle with a table saw, it’s crucial to properly prepare the tool for the task. In this section, we will discuss the essential steps to ensure accuracy and safety when making angle cuts. By following these guidelines, you’ll be able to achieve precise angled cuts with your table saw.
Adjusting the blade height and angle
One of the first steps in preparing your table saw for angle cuts is adjusting the blade height and angle. To make accurate angle cuts, you need to ensure that the height of your blade matches the desired angle of your cut. Follow these steps to adjust the blade height and angle:
- Turn off the table saw and unplug it from the power source for safety.
- Locate the height adjustment wheel or lever on your table saw. This allows you to raise or lower the blade.
- Rotate the wheel or adjust the lever to raise or lower the blade to the desired height. Make sure to refer to the saw’s manual for the specific instructions on adjusting the blade height.
- To adjust the angle of the blade, locate the angle adjustment knob or lever. This varies depending on the model of your table saw.
- Rotate the knob or adjust the lever to set the blade at the desired angle for your cut.
- Check the blade height and angle again to ensure it matches your intended cut. Make any necessary adjustments until you achieve the desired settings.
Ensuring the accuracy of the miter gauge
The miter gauge is a crucial tool for making precise angle cuts on a table saw. It allows you to guide the wood through the blade at a specific angle. To ensure the accuracy of the miter gauge, follow these steps:
- Check the miter gauge for any signs of damage or wear. Replace it if necessary to ensure accurate cuts.
- Place the miter gauge onto the miter slot on your table saw. The miter slot is usually located on the tabletop and runs parallel to the blade.
- Slide the miter gauge forward or backward to align it with the desired angle for your cut. Most miter gauges have angle markings to help you set the correct angle.
- Tighten the miter gauge in place, ensuring it is secure before making your cut.
- Double-check the accuracy of the miter gauge by aligning it with a straight edge or using a square to confirm that it is set correctly.
Choosing the appropriate safety equipment
When performing any cutting tasks with a table saw, it’s crucial to prioritize safety. Here are some safety equipment options to consider:
- Safety glasses: Protect your eyes from flying debris by wearing safety glasses at all times.
- Hearing protection: Table saws can be loud, so it’s important to wear earplugs or earmuffs to protect your hearing.
- Dust mask: Wood cutting can generate a significant amount of particles, so wearing a dust mask will help protect you from inhaling dust and other airborne contaminants.
- Push stick or push block: Use a push stick or push block to safely guide the wood through the blade instead of risking your hands being too close to the blade.
By following these steps and ensuring the appropriate safety measures, you’ll be ready to cut wood at an angle with your table saw. Remember to always prioritize safety and accuracy for a successful and injury-free woodworking experience.
Executing Precise Angle Cuts With A Table Saw
When it comes to woodworking projects, executing precise angle cuts is crucial for achieving accurate and professional-looking results. A table saw is a versatile tool that can make this task easier and more efficient. In this guide, we will go over the step-by-step process of cutting wood at an angle with a table saw, ensuring that each cut is precise and clean.
Measuring and Marking the Desired Angle
The first step in cutting wood at an angle with a table saw is to accurately measure and mark the desired angle on the piece of wood you are working with. This can be done using a protractor, a combination square, or another suitable measuring tool. Once you have determined the angle, use a pencil or marker to make a clear and visible mark on the wood.
Take your time to ensure that the measurement and marking are precise, as any discrepancy at this stage will affect the final result. Double-check your measurements before proceeding to the next step.
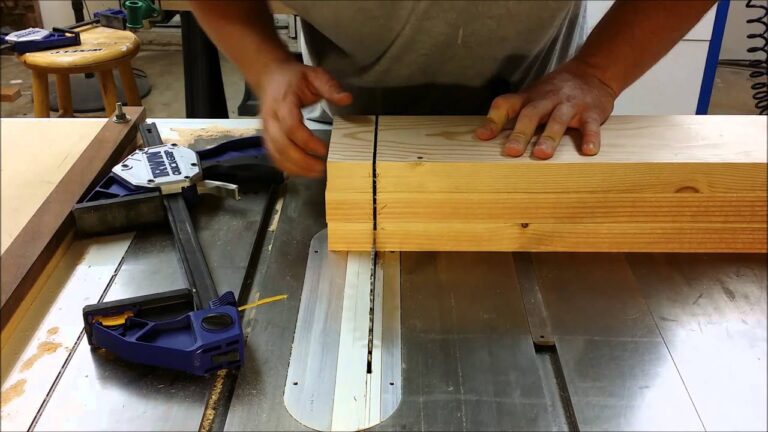
Positioning the Wood and Securing it Safely
After marking the desired angle, it is time to position the wood on the table saw. The key here is to align the marked line with the correct angle on the saw’s miter gauge or fence. The miter gauge allows you to make angular cuts, while the fence provides stability and support.
Make sure the wood is firmly secured before beginning the cut. This can be done by using clamps or other appropriate methods to prevent any movement or slippage. Safety should always be a priority, so take extra precautions to ensure that the wood is secure and stable.
Maintaining a Smooth Feed Rate and Steady Control
Once the wood is properly positioned and secured, it is time to make the cut. To achieve a clean and precise angle cut, you need to maintain a smooth feed rate and steady control throughout the process.
Begin by slowly pushing the wood towards the rotating blade of the table saw. Keep a firm grip on the wood and guide it smoothly along the intended path. Avoid applying excessive force, as this can cause the wood to jump or bind, resulting in an uneven cut.
As you feed the wood through the saw, pay attention to the feed rate. Too fast of a feed rate can cause the wood to splinter or burn, while too slow of a feed rate can lead to an uneven cut. Find a balance that allows for a smooth and controlled movement, ensuring that the blade cuts through the wood cleanly.
Conclusion
Executing precise angle cuts with a table saw is a skill that takes practice and attention to detail. By following these steps, you can achieve accurate and clean angle cuts that will enhance the quality of your woodworking projects. Remember to measure and mark the desired angle accurately, position the wood securely, and maintain a smooth feed rate and steady control. With patience and practice, you will be able to master the art of cutting wood at an angle with a table saw.
Conclusion
Cutting wood at an angle with a table saw can seem intimidating at first, but with the right technique and safety precautions, it can be easily accomplished. Start by setting the appropriate angle on the table saw’s blade and fence.
Use a miter gauge or sled to guide the wood through the cut, ensuring precision and accuracy. Remember to wear proper safety gear, such as goggles and gloves, and keep your hands away from the blade at all times. Practice on scrap wood before tackling your actual project to familiarize yourself with the process.
By following these steps, you can achieve clean and precise angled cuts with your table saw. Remember to take your time, be patient, and prioritize safety above all else. Happy cutting!