How To Use A Table Saw?
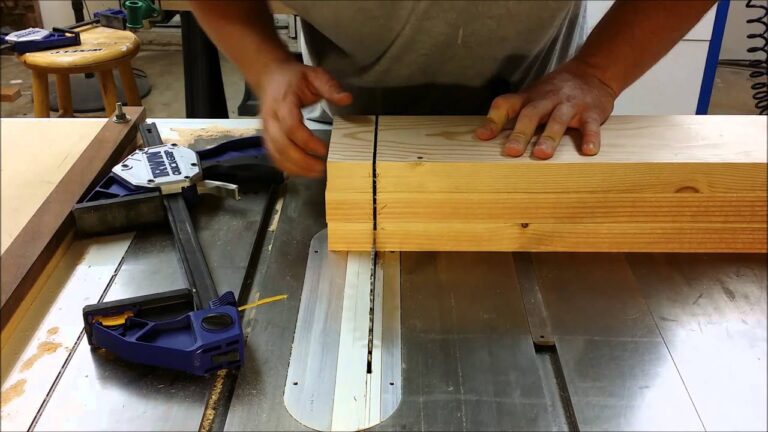
To use a table saw, position the wood on the table, adjust the blade height and fence alignment, then push the wood through the blade while keeping your hands clear of the blade’s path. Using a table saw involves carefully positioning the wood on the table, making sure the blade is properly adjusted and the fence is aligned, and pushing the wood through the blade while maintaining safety measures.
It is imperative to keep your hands away from the blade’s path to avoid accidents and achieve accurate cuts. Mastering the basics of using a table saw is crucial for efficient and precise woodworking. With practice, you can confidently create various cuts and shapes using this versatile power tool.
Understanding The Basics
Mastering the basics of using a table saw is essential for any woodworker. In this comprehensive guide, we explore step-by-step instructions and safety tips to help you operate a table saw with confidence and precision.
Different components of a table sawA table saw is a versatile and powerful tool that is commonly used in woodworking projects. To effectively use a table saw, it is essential to have a good understanding of its various components. Let’s take a closer look at the different parts that make up a table saw:
1. Blade
The blade is the heart of a table saw. It is responsible for cutting through different materials such as wood, metal, or plastic. Table saw blades come in various sizes and types, each suitable for specific cutting tasks. When using a table saw, make sure to choose the right blade for your project to achieve accurate and clean cuts.
2. Tabletop
The tabletop is the flat surface where you place your workpiece during cutting. It provides stability and support for the material as it moves across the blade. Table saw tabletops are typically made of cast iron or aluminum, offering durability and a smooth surface for easy sliding.
3. Fence
The fence is a guide that helps you make precise cuts by keeping the workpiece in the correct position. It runs parallel to the blade and can be adjusted for different widths. A reliable and sturdy fence is crucial for achieving accurate and repeatable cuts on a table saw.
4. Miter Gauge
The miter gauge is another essential component of a table saw. It allows you to make angled cuts or crosscuts with precision. A miter gauge consists of a head, which is attached to the tabletop, and a guide that slides along the head, allowing you to position the workpiece at the desired angle.
5. Dust Collection System
Keeping the workspace clean and free from debris is important for both safety and efficiency. Many table saws come with a dust collection system, which includes a port where you can connect a vacuum or dust collector. This system helps to remove sawdust and debris, keeping your work area clear and reducing the risk of accidents.
Types Of Table Saws – Portable, Contractor, Cabinet
Table saws come in different types, each suited for specific purposes and levels of usage. Understanding the distinctions between portable, contractor, and cabinet table saws will help you choose the right one for your needs:
1. Portable Table Saw
A portable table saw is lightweight and designed for jobs on the go. It is compact and easy to transport, making it a popular choice for contractors or DIY enthusiasts who frequently move their equipment. Portable table saws are ideal for small to medium-sized projects but may lack some features found in larger models.
2. Contractor Table Saw
A contractor table saw is a step up in terms of power and durability. These saws have larger tables and more robust fence systems, offering increased stability and accuracy. Contractor table saws are suitable for both professionals and serious hobbyists who require a reliable tool for larger projects.
3. Cabinet Table Saw
Cabinet table saws are the most heavyweight and powerful option in the table saw family. Built with heavy-duty components and enclosed cabinets, these saws are designed for professional use and heavy-duty cutting tasks. Cabinet table saws provide unparalleled precision, power, and stability, making them ideal for professional woodworkers or those who demand the best.
Important Safety Features To Consider
When it comes to using a table saw, safety should always be a top priority. Here are some essential safety features to consider when selecting a table saw:
1. Blade Guard
A blade guard is a protective cover that encloses the saw blade to prevent accidents and injuries. It should be easy to install, remove, and adjust as needed. A well-designed blade guard allows for safe and unobstructed cutting while minimizing the risk of contact with the spinning blade.
2. Riving Knife
A riving knife is a metal piece mounted directly behind the blade, aligning with the cutting edge. It helps prevent kickback, which is a sudden and violent movement of the workpiece propelled back towards the operator. A riving knife keeps the workpiece from pinching the blade, reducing the risk of accidents and enhancing overall safety.
3. Anti-Kickback Pawls
Anti-kickback pawls are small teeth-like devices that sit on either side of the blade. They prevent the workpiece from moving backward by digging into the material’s surface. This feature adds an extra layer of protection against kickback incidents, keeping the wood securely in place.
4. Emergency Stop Button
An emergency stop button, often referred to as a kill switch or panic button, is a quickly accessible feature that allows you to instantly shut off the table saw in case of an emergency. It should be located within reach and easily recognizable to ensure immediate response and prevent potential accidents.
5. Overload Protection
Overload protection is a safety feature that automatically shuts off the table saw when it detects an excessive load or strain on the motor. This feature helps prevent damage to the tool and reduces the risk of motor burnout. Look for a table saw with a reliable overload protection system to ensure both safety and longevity of the equipment.
Setting Up Your Table Saw
Setting up your table saw correctly is crucial to ensuring accurate cuts and a safe working environment. In this section, we will guide you through the essential steps for setting up your table saw, including choosing the right location, assembling the table saw properly, and adjusting the blade and fence alignment.
Choosing The Right Location For Your Table Saw
Before assembling your table saw, it is important to choose the right location in your workshop or workspace. Here are a few factors to consider:
- Space: Ensure that you have enough space around the table saw to maneuver large workpieces and to work comfortably.
- Stability: Place the table saw on a sturdy and level surface to minimize vibrations and prevent accidents. Avoid setting it up on uneven or slippery surfaces.
- Lighting: Adequate lighting is essential for your safety and to clearly see the cutting lines. Set up your table saw in a well-lit area or install additional lights if needed.
- Ventilation: Table saws can generate a significant amount of sawdust or fumes. Ensure proper ventilation in your workspace to maintain a clean and safe environment.
Properly Assembling The Table Saw
Now that you have chosen the right location, let’s move on to properly assembling your table saw. Follow these steps:
- Read the manual: Carefully read the manufacturer’s manual to understand the specific steps and precautions for assembling your table saw model.
- Attach the base: Begin by attaching the base or stand to the table saw, making sure it is securely fastened and stable.
- Attach the tabletop: Next, place the tabletop onto the base and align it correctly. Use the provided hardware to secure the tabletop in place.
- Install the blade guard and splitter: Attach the blade guard and splitter according to the manufacturer’s instructions. These safety features help protect your hands from accidental contact with the blade.
- Connect the power source: Before plugging in your table saw, ensure that it is compatible with your power source and that all connections are secure. Safety should always be a priority.
Adjusting The Blade And Fence Alignment
Proper alignment of the blade and fence is essential for accurate cuts. Follow these steps to adjust the alignment:
- Blade alignment: Use a combination square or a specialized alignment tool to ensure that the blade is perpendicular to the tabletop. Make necessary adjustments according to the manufacturer’s instructions.
- Fence alignment: Check the alignment of the fence parallel to the blade. Adjust the fence position as needed to avoid any binding or kickback during cutting.
By carefully following these steps, you can ensure that your table saw is properly set up and ready for use. Remember to always prioritize safety and consult the manufacturer’s manual for any specific guidance related to your model of table saw.
Safety Measures For Table Saw Usage
When it comes to using a table saw, safety should always be your top priority. Understanding and implementing the correct safety measures is crucial in order to prevent any accidents or injuries. Whether you are a beginner or an experienced woodworker, it is essential to follow these safety guidelines to ensure a safe and productive working environment.
Wearing Appropriate Safety Gear
Before you even start using a table saw, it is important to wear the necessary safety gear to protect yourself. Here are some safety gears you should always have on:
- Eye Protection: Wear safety goggles or a face shield to protect your eyes from flying debris.
- Hearing Protection: Loud noises from the table saw can damage your hearing. Use ear muffs or earplugs to protect your ears.
- Respiratory Protection: Sawdust and other airborne particles can be harmful to your respiratory system. Always wear a dust mask or respirator to keep your lungs protected.
- Protective Clothing: Wear fitted clothing and avoid loose-fitting items that may get caught in the machinery. Steel-toed boots and gloves are also recommended.
Understanding Kickback And How To Prevent It
Kickback is one of the most dangerous hazards when working with a table saw. It occurs when the wood being cut is forcefully thrown back towards the operator. To prevent kickback, follow these precautions:
- Use a Riving Knife: A riving knife helps prevent kickback by keeping the cut material from binding against the back of the saw blade.
- Keep a Firm Grip: Always maintain a firm grip on the workpiece, especially during the entire cutting process. This will help you stay in control and reduce the risk of kickback.
- Avoid Overloading the Blade: Allow the saw blade to cut at its own pace. Forcing a feed rate that is too fast can lead to kickback.
Keeping The Workspace Clean And Organized
A clean and organized workspace is not only important for efficiency but also for safety. Clutter and debris can cause accidents and hinder your ability to work safely. Follow these practices to keep your workspace clean:
- Clear Excess Sawdust: Regularly remove sawdust from the table, fence, and floor to prevent slipping and ensure accurate cuts.
- Secure the Workpiece: Make sure your workpiece is properly secured before making any cuts. Unsecured materials can shift or get caught in the blade, leading to accidents.
- Keep Tools and Accessories Organized: Store your tools and accessories in designated places to avoid tripping hazards and minimize the risk of accidents.
By adhering to these safety measures for table saw usage, you can reduce the risk of accidents and work with confidence. Prioritize safety, wear appropriate gear, understand and prevent kickback, and maintain a clean and organized workspace for a safe and productive woodworking experience.
Operating A Table Saw Safely
A table saw is a powerful tool that can be incredibly useful for various woodworking projects. However, it can also be dangerous if not operated with caution. To ensure your safety, it’s essential to understand the proper techniques and precautions for operating a table saw. In this section, we will explore three crucial aspects of safely using a table saw: properly positioning and securing the workpiece, adjusting the cutting depth and angle, and using push sticks and featherboards for added safety.
Properly Positioning And Securing The Workpiece
Before cutting any material with a table saw, it’s important to position and secure the workpiece correctly. This ensures stability and reduces the chances of accidents. Here are a few key steps to follow:
- Clear the workspace: Begin by clearing any clutter from the work area, ensuring there are no obstructions that could interfere with the cutting process.
- Use a sturdy work surface: Place the table saw on a stable and level workbench or table, ensuring that it won’t wobble during operation.
- Secure the workpiece: Utilize appropriate clamps or the table saw’s built-in securing mechanisms to firmly hold the workpiece in place. This reduces the risk of it shifting or getting caught in the blade.
- Maintain proper clearance: Ensure there is ample distance between the blade and any surrounding objects or obstacles to prevent accidental contact.
Adjusting The Cutting Depth And Angle
One of the great advantages of a table saw is its ability to make precise cuts at different depths and angles. To achieve the desired results and maintain safety while doing so, follow these steps:
- Select the appropriate blade: Choose a blade that suits the type of material you are cutting, ensuring it is sharp and in good condition.
- Adjust the cutting depth: Refer to the table saw’s manual to understand how to adjust the cutting depth. Set it to a level that allows you to make the desired cut while ensuring the blade doesn’t extend too far beyond the workpiece.
- Set the cutting angle: Some cuts require the blade to be tilted at an angle. Use the table saw’s angle adjustment mechanism to accurately set the desired cutting angle.
- Test the settings: Before making the actual cut, double-check the cutting depth and angle settings by running a test piece through the saw. This allows you to make any necessary adjustments without risking damage to your workpiece.
Using Push Sticks And Featherboards For Added Safety
Push sticks and featherboards are invaluable tools for ensuring your hands and fingers stay safe during table saw operation. Here’s how to incorporate them into your woodworking routine:
- Push sticks: Whenever possible, use a push stick to guide the workpiece through the saw. This keeps your hands at a safe distance from the blade, reducing the risk of accidents.
- Featherboards: Featherboards are attachments that hold the workpiece against the table’s fence, ensuring a consistent and secure feed. They help prevent kickback and keep your hands away from the blade.
- Positioning and adjusting: Place the push stick or featherboard in the appropriate location to provide adequate pressure and control. Adjust them as needed to accommodate different sizes and shapes of wood.
- Regular inspection and maintenance: Periodically inspect your push sticks and featherboards for any signs of wear or damage. Replace them if necessary to ensure they function properly and offer optimal safety.
By adhering to these guidelines and employing the necessary safety measures, you can confidently and securely operate a table saw. Remember, safety should always be a top priority in any woodworking project.
Essential Table Saw Techniques
Understanding essential table saw techniques is crucial for anyone looking to harness the power of this versatile tool. Whether you are a beginner or experienced woodworker, mastering these techniques will not only improve your precision and efficiency but also ensure your safety while operating the table saw. In this article, we will explore three vital table saw techniques: making rip cuts, crosscutting techniques, and making bevel and miter cuts.
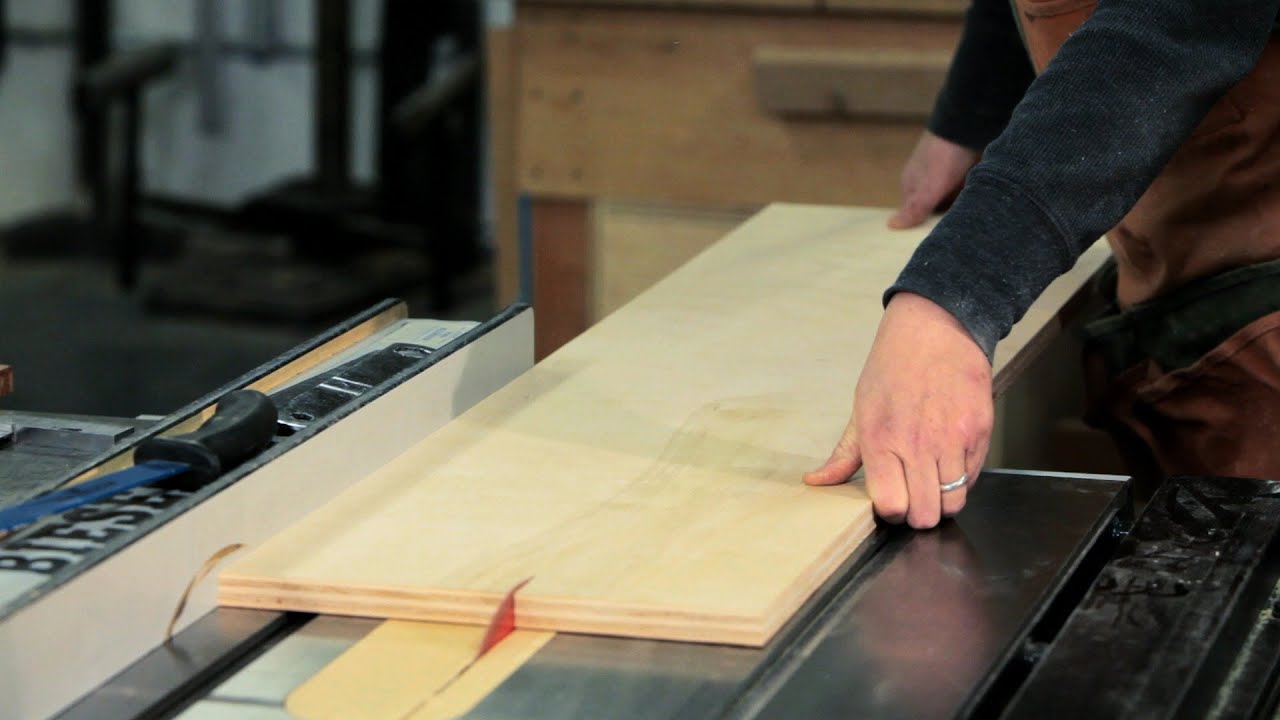
Making Rip Cuts
One of the most basic yet essential table saw techniques is making rip cuts, which involves cutting wood pieces along the grain. This technique allows you to transform larger boards or plywood sheets into narrower strips, making it a fundamental skill in woodworking. To make precise rip cuts:
- Start by adjusting the rip fence parallel to the saw blade.
- Position the wood piece with its wider side against the rip fence.
- Ensure that the wood is in firm contact with the fence and the table surface.
- Turn on the table saw, and gently push the wood piece through the blade using a push stick or push block.
- Maintain a steady and smooth feed rate throughout the cut.
Remember to always wear appropriate safety gear like safety glasses and hearing protection and take your time to ensure accuracy and prevent kickback.
Crosscutting Techniques
In addition to rip cuts, crosscutting is another essential technique that allows you to make cuts across the grain of the wood. Whether you need to resize a piece or create angled cuts, mastering crosscutting techniques is vital. Here are some key steps to effectively crosscut:
- Begin by aligning the miter gauge parallel to the saw blade.
- Set the desired angle on the miter gauge if making angled cuts.
- Place the wood piece against the miter gauge, ensuring it is securely held.
- Activate the table saw and push the wood piece smoothly through the blade.
- Maintain control over the wood piece to avoid any binding or kickback.
By mastering crosscutting techniques, you can achieve precise and clean cuts with ease.
Making Bevel And Miter Cuts
Table saws also provide the flexibility to make bevel and miter cuts, allowing you to add intricacy and variety to your woodworking projects. Bevel cuts involve tilting the blade to create angled edges, while miter cuts involve rotating the workpiece to create angled crosscuts. Here’s how to execute these techniques:
- Adjust the blade angle to the desired bevel or miter angle.
- Securely set the miter gauge for accurate positioning.
- Hold the wood piece against the miter gauge or the rip fence, depending on the type of cut.
- Turn on the table saw, and cautiously guide the wood piece through the blade.
- Regularly check the alignment and adjust if necessary to ensure precise cuts.
Remember to take extra precautions while making bevel and miter cuts due to the increased complexity of the angles involved.
With a solid understanding of these essential table saw techniques, you will be equipped to tackle a wide range of woodworking projects and achieve professional results. Practice these techniques in a controlled environment and prioritize safety at all times. Now, let’s put our skills to the test and create impressive woodworking masterpieces!
Advanced Table Saw Techniques
Once you’ve mastered the basics of using a table saw, it’s time to take it to the next level with some advanced techniques. These techniques will allow you to expand your woodworking repertoire and tackle more complex projects. In this article, we’ll explore three advanced table saw techniques: dado and groove cutting, rabbet and dado joinery, and making compound and angled cuts.
Dado And Groove Cutting
Dado and groove cuts are commonly used in woodworking to create slots and channels for joining pieces of wood together. A dado cut is a wide, flat-bottomed groove cut across the grain, while a groove cut is a similar cut made with the grain.
To make a dado or groove cut, you’ll need a dado blade set, which consists of two outer blades and a set of chippers. These blades will enable you to remove a precise amount of material, resulting in a clean and accurate cut.
| Steps for Dado and Groove Cutting |
|---|
| 1. Set up the dado blade set by removing the regular saw blade and attaching the appropriate blades and chippers. |
| 2. Adjust the height of the blade to match the desired depth of the dado or groove cut. |
| 3. Adjust the width of the blades and chippers to match the desired width of the dado or groove cut. |
| 4. Use a miter gauge or a sled to guide the workpiece and make the cut. Make sure to make multiple passes if necessary for larger cuts. |
Rabbet And Dado Joinery
Rabbet and dado joints are commonly used in woodworking to create strong and secure connections between two pieces of wood. A rabbet joint involves cutting a groove along the edge of one piece of wood to fit another piece of wood. A dado joint, on the other hand, involves cutting a groove across the grain of one piece of wood to fit another piece of wood.
To create rabbet and dado joints, you can use a regular saw blade or a dado blade set, depending on the size and depth of the joint you’re aiming for. It’s important to carefully measure and mark the location of the joint before making the cuts.
- Measure and mark the location of the joint on both pieces of wood.
- Set up the table saw with the appropriate blade for the desired joint.
- Adjust the height and width of the blade to match the dimensions of the joint.
- Use a miter gauge or a sled to guide the workpiece and make the cut, ensuring that the groove is aligned with the marked location.
- Repeat the process for the second piece of wood, ensuring that the rabbet or dado fits snugly.
Making Compound And Angled Cuts
Compound and angled cuts are often required when creating complex woodworking projects, such as beveled edges, miters, and compound joints. These cuts can add style, aesthetics, and functionality to your workpieces.
To make compound and angled cuts on a table saw, you’ll need to adjust both the blade angle and the table saw’s miter gauge or bevel gauge. It’s important to take precise measurements and make test cuts before cutting your actual workpiece to ensure accuracy.
- Measure and mark the desired angle or bevel on the workpiece.
- Adjust the blade angle on the table saw to match the desired angle.
- Set the miter gauge or bevel gauge to the desired angle.
- Secure the workpiece against the miter gauge or bevel gauge and guide it through the blade to make the cut.
With these advanced table saw techniques in your woodworking arsenal, you’ll be able to tackle a wide range of projects with precision and skill. Remember to prioritize safety when operating a table saw and always wear appropriate protective gear. Happy crafting!
Troubleshooting And Maintenance
When it comes to using a table saw, it’s not just about making precise cuts. Proper troubleshooting and maintenance play a crucial role in ensuring the longevity and optimal performance of your tool. In this section, we will discuss common table saw problems and their solutions, regular cleaning and maintenance tips, as well as sharpening and replacing saw blades.
Common Table Saw Problems And Their Solutions
Table saws are incredible machines, but occasionally they may encounter issues that can hinder their performance. Here are some common problems you might face and their quick solutions:
| Problem | Solution |
|---|---|
| Blade not aligned with the miter slot | Loosen the blade mounting bolts, align the blade parallel to the miter slot, and retighten the bolts. |
| Excessive vibration during operation | Check if the blade is properly balanced. If not, use a blade balancer to adjust the balance. Also, ensure the arbor nut is tightened securely. |
| Uneven or inaccurate cuts | Ensure the rip fence and miter gauge are aligned properly. Also, make sure the blade is sharp and not dull or damaged. |
| Difficulty raising or lowering the blade | Check if there’s any debris or sawdust clogging the elevation mechanism. Clean it thoroughly and lubricate with a silicone-based spray. |
Boldly address these problems as they arise to ensure smooth and efficient operation of your table saw.
Regular Cleaning And Maintenance Tips
Maintaining a clean and well-maintained table saw is essential for optimal performance and safety. Here are some tips to keep your table saw in top-notch condition:
- Always disconnect the power source before cleaning or performing maintenance.
- Regularly remove accumulated sawdust and debris from the tabletop, miter slots, and blade guard. Use a brush or vacuum for best results.
- Inspect the power cords and switches for any signs of damage. Replace them if necessary.
- Ensure the rip fence and miter gauge operate smoothly without any obstructions or misalignments. Clean and lubricate them if needed.
- Inspect the safety features, such as the blade guard and anti-kickback pawls, to ensure they are functioning properly.
Maintaining a clean and well-maintained table saw not only increases its lifespan but also reduces the risk of accidents during operation.
Sharpening And Replacing Saw Blades
A dull or damaged saw blade not only affects the quality of your cuts but can also lead to safety hazards. Follow these steps to ensure your saw blades are sharp and in good condition:
- Disconnect the power source and remove the blade from the saw.
- Inspect the blade for any chipped or missing carbide tips. If damaged, replace the blade.
- Using a sharpening stone or blade sharpener, carefully sharpen the blade according to the manufacturer’s instructions.
- Once sharpened, reattach the blade securely, ensuring it is aligned with the miter slot.
Regularly sharpening and replacing your saw blades will not only enhance the performance of your table saw, but it will also ensure clean and accurate cuts every time.

Credit: www.bobvila.com
Frequently Asked Questions Of How To Use A Table Saw?
How Do You Properly Use A Table Saw?
To use a table saw safely: 1. Make sure the blade is sharp, clean, and properly aligned. 2. Wear safety goggles, gloves, and a dust mask. 3. Secure the wood tightly against the fence and the table. 4. Use a push stick or push block to keep your hands safe from the blade.
5. Maintain a steady and controlled feed rate while cutting.
What Are The Disadvantages Of A Table Saw?
The disadvantages of a table saw include the risk of injury due to the exposed blade, the need for a large workspace, and the limitation of only being able to make straight cuts. The noise and dust generated by the saw can also be a drawback.
What Not To Do While Using A Table Saw?
To use a table saw safely, avoid the following actions: 1. Wearing loose clothing or jewelry that can get caught in the blade. 2. Failing to use the safety guard and blade guard. 3. Standing directly in front of the blade’s path.
4. Pushing the wood through the saw too quickly. 5. Using the saw without proper training or experience.
What Is The Safest Way To Use A Table Saw?
To use a table saw safely: 1. Always wear protective gear like safety glasses and gloves. 2. Use a push stick or push block to keep your hands away from the blade. 3. Keep the workspace clean and organized to avoid distractions and accidents.
4. Adjust the blade height to just above the material being cut. 5. Follow the manufacturer’s instructions and never remove safety features.
Conclusion
To sum up, mastering the use of a table saw is a valuable skill for any DIY enthusiast or woodworking hobbyist. By following the safety precautions, adjusting the settings, and practicing various techniques, you can ensure efficient and precise cuts.
Remember to maintain and clean your table saw regularly for long-lasting performance. So, don’t hesitate to dive into the world of table saws and let your creativity flow! Happy woodworking!